Users
Last updated
Last updated
The User and Group menu is designed to manage users, control their access to specific functions, and handle group assignments.
It allows for the creation of local Helmut4 users, as well as the import of users from both an existing Active Directory, Okta and a Flow database.
Within Helmut4, users can be created or imported from the following sources:
Active Directory (local AD only, no Azure or global catalog support)
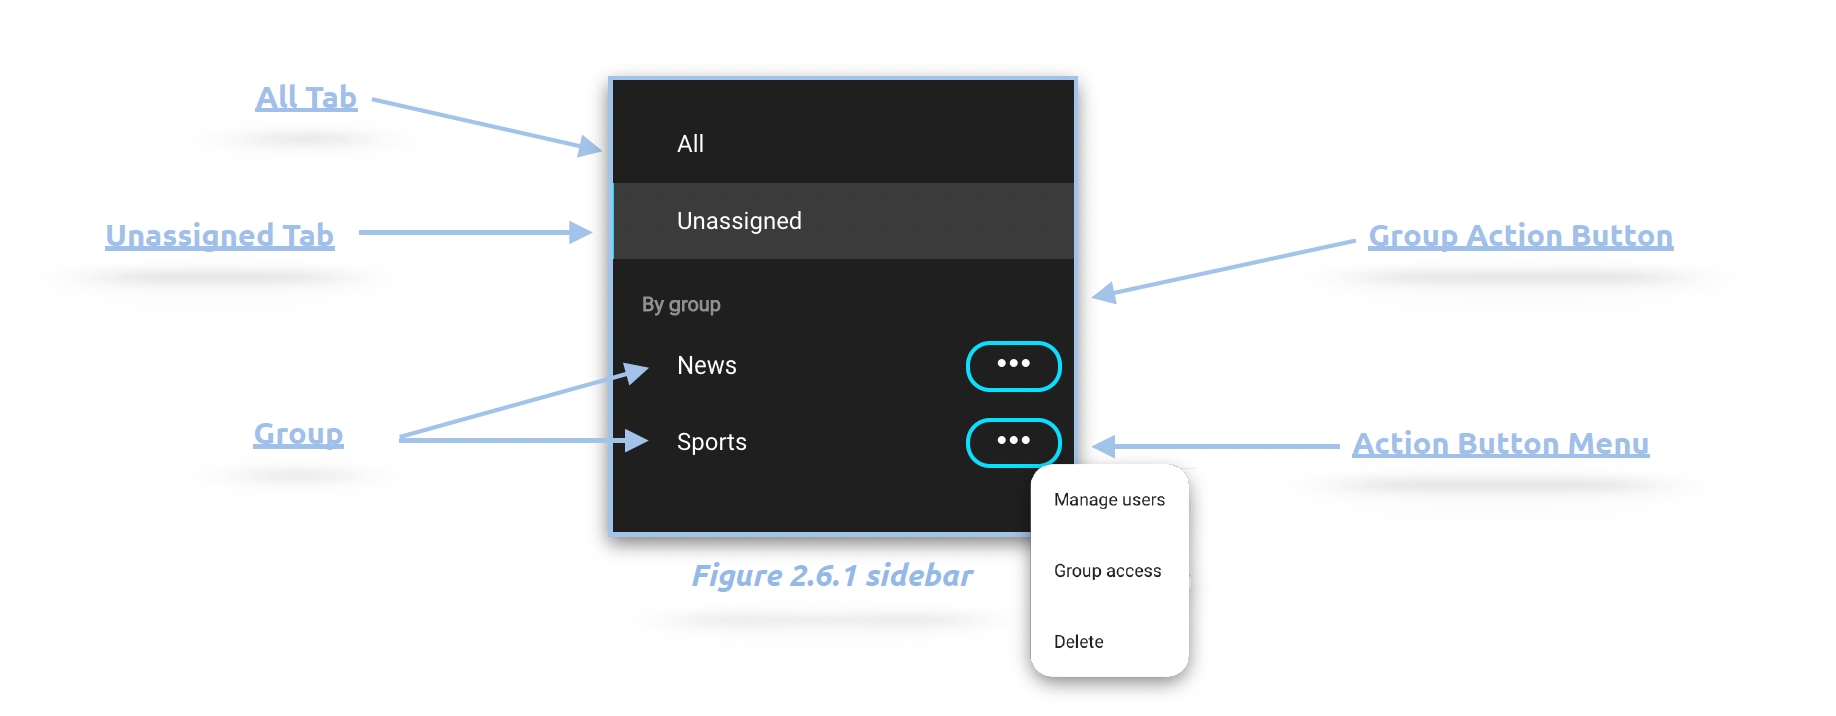
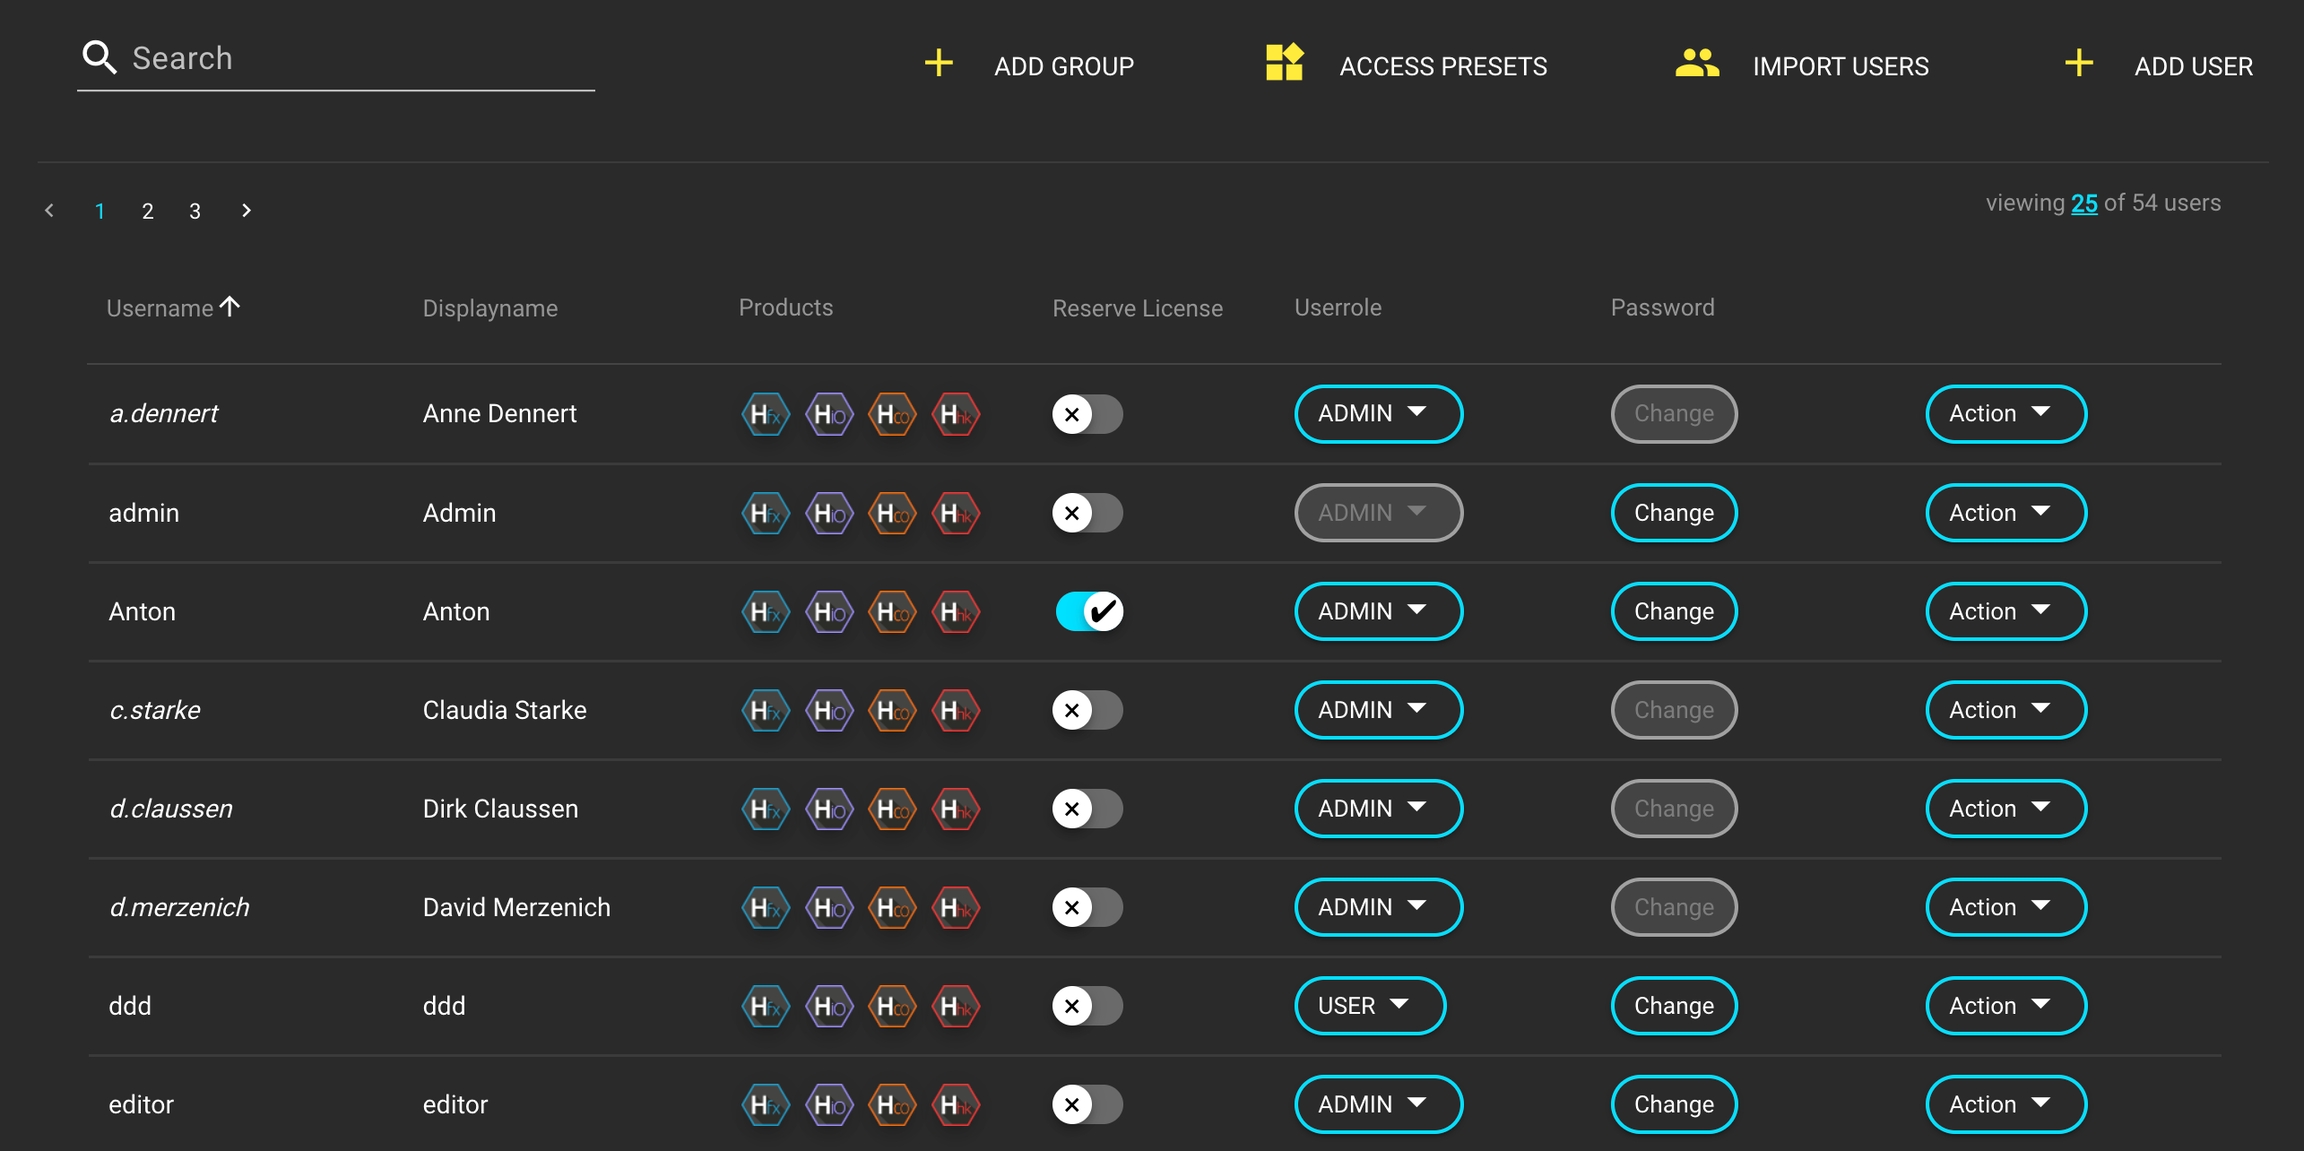
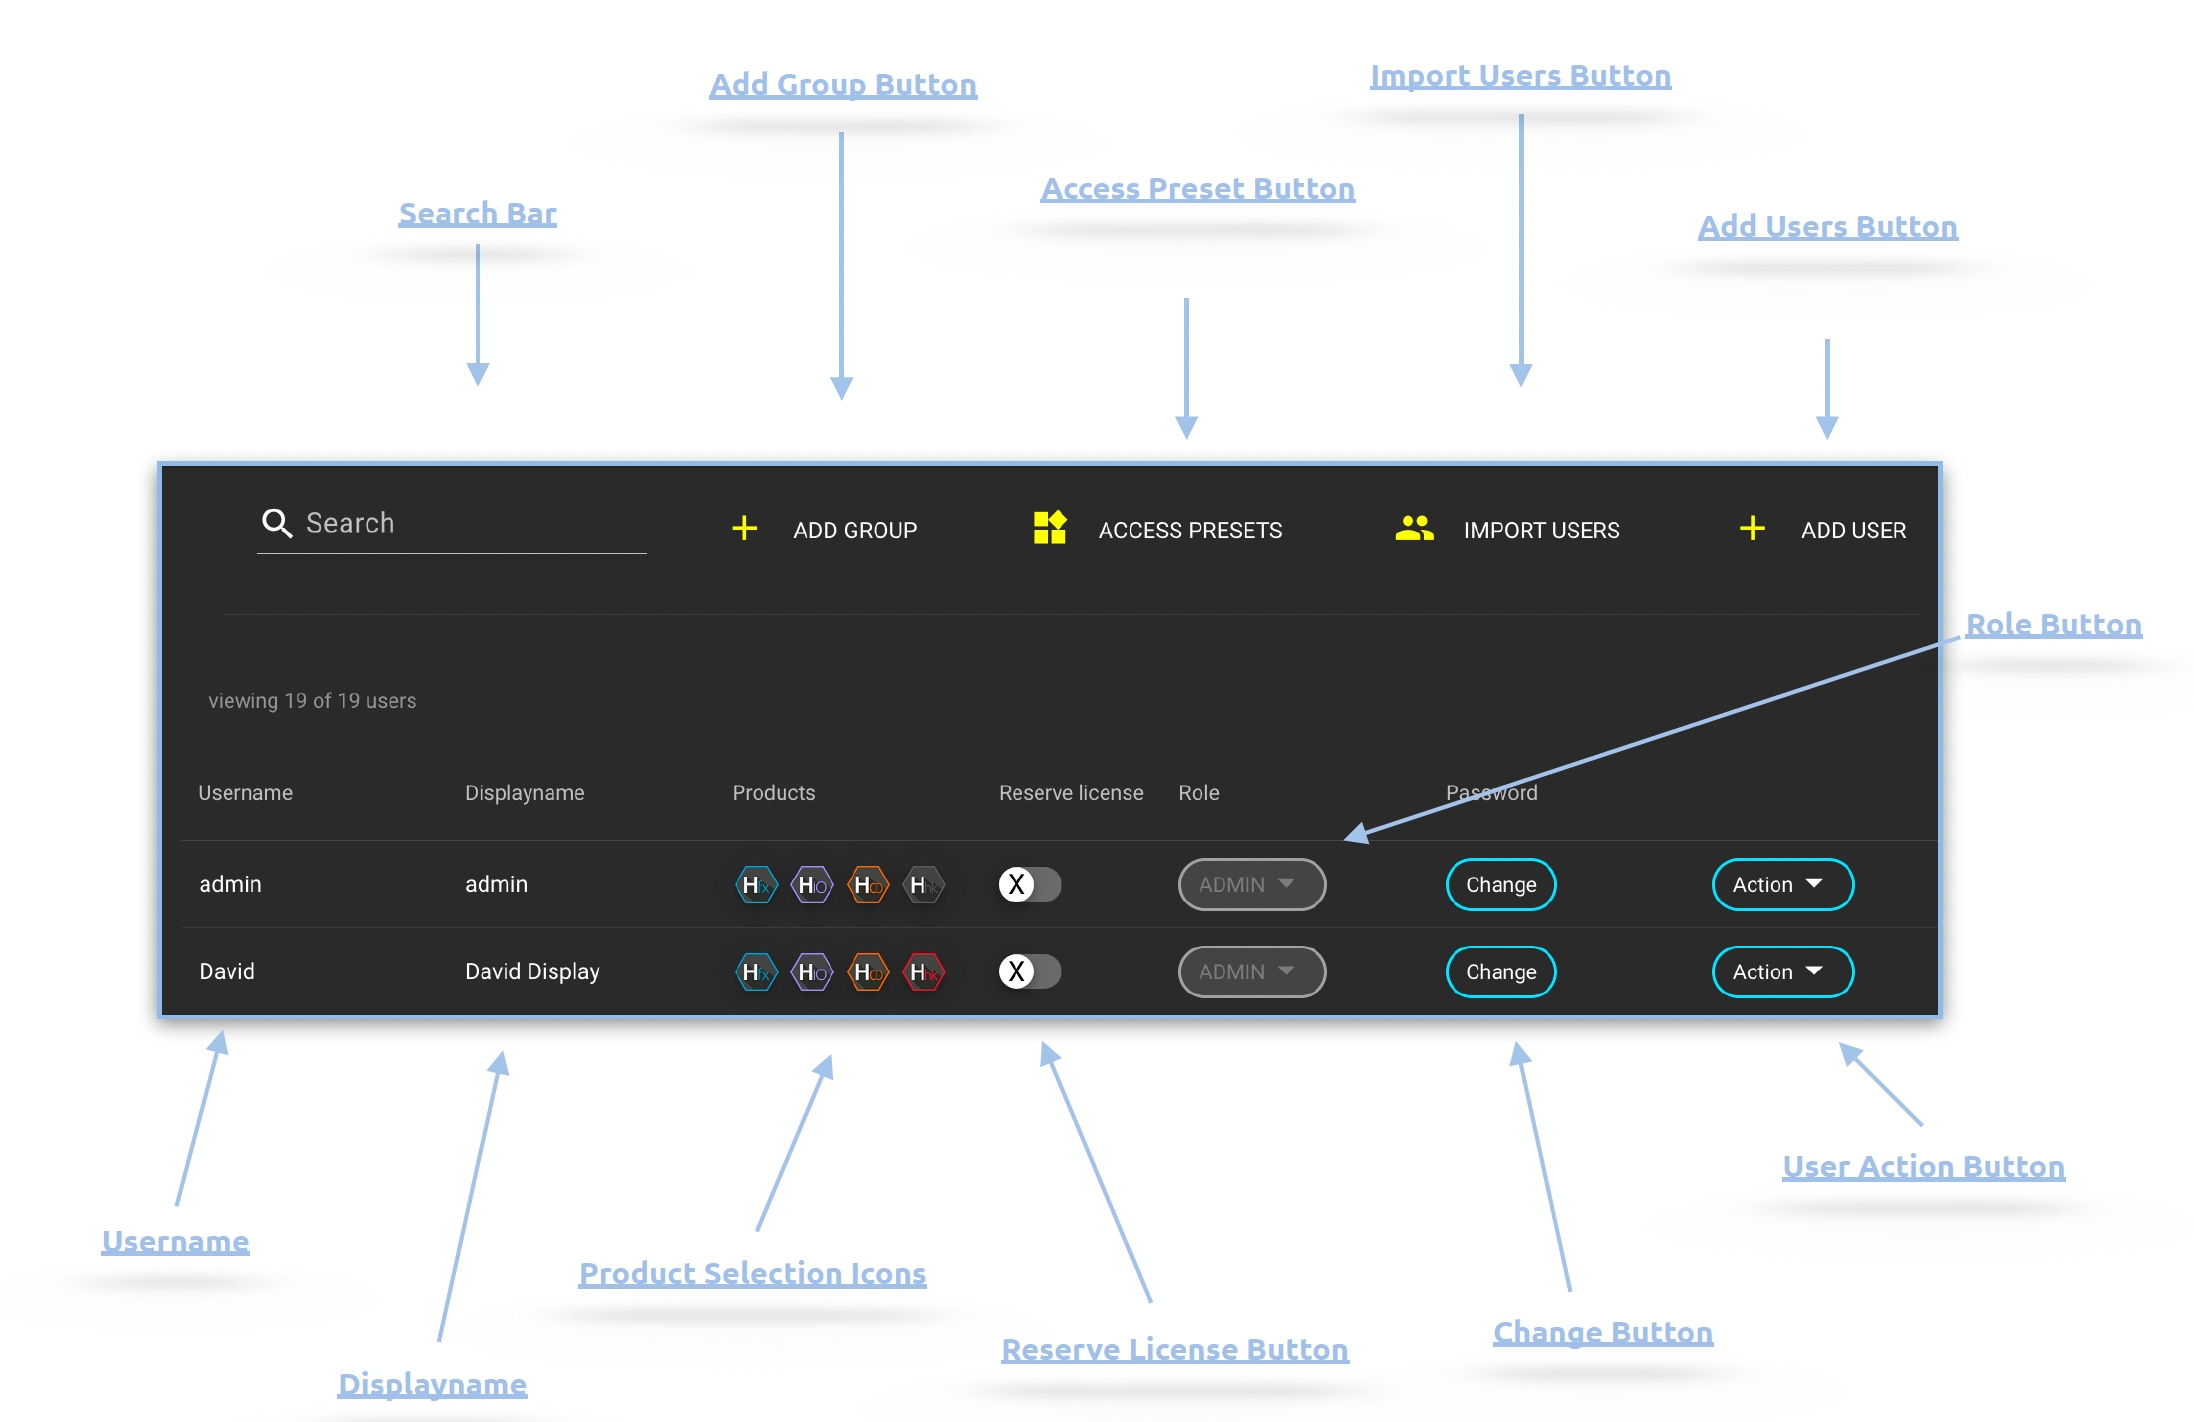
The Users menu is structured with a list and a sidebar view, offering the following functions:
Displays all available users within the system.
Shows all users who are not assigned to any group.
A user may become unassigned if their account has been manually or automatically removed from a helmet group, for example, through Active Directory sync.
View all groups created in the system and apply filters to display users in the list view when selecting a specific group.
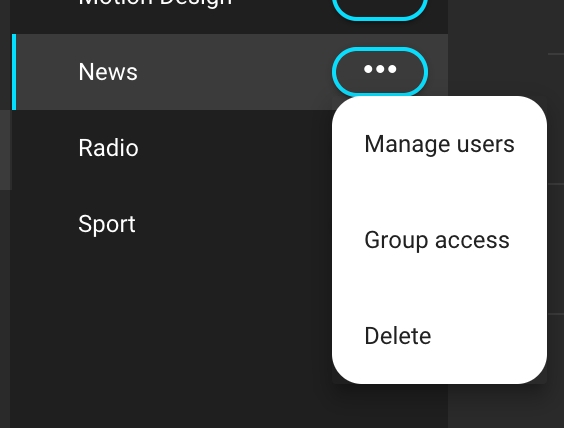
Utilize the Action button menu to perform actions such as deleting groups, modifying their access rights, and assigning users.
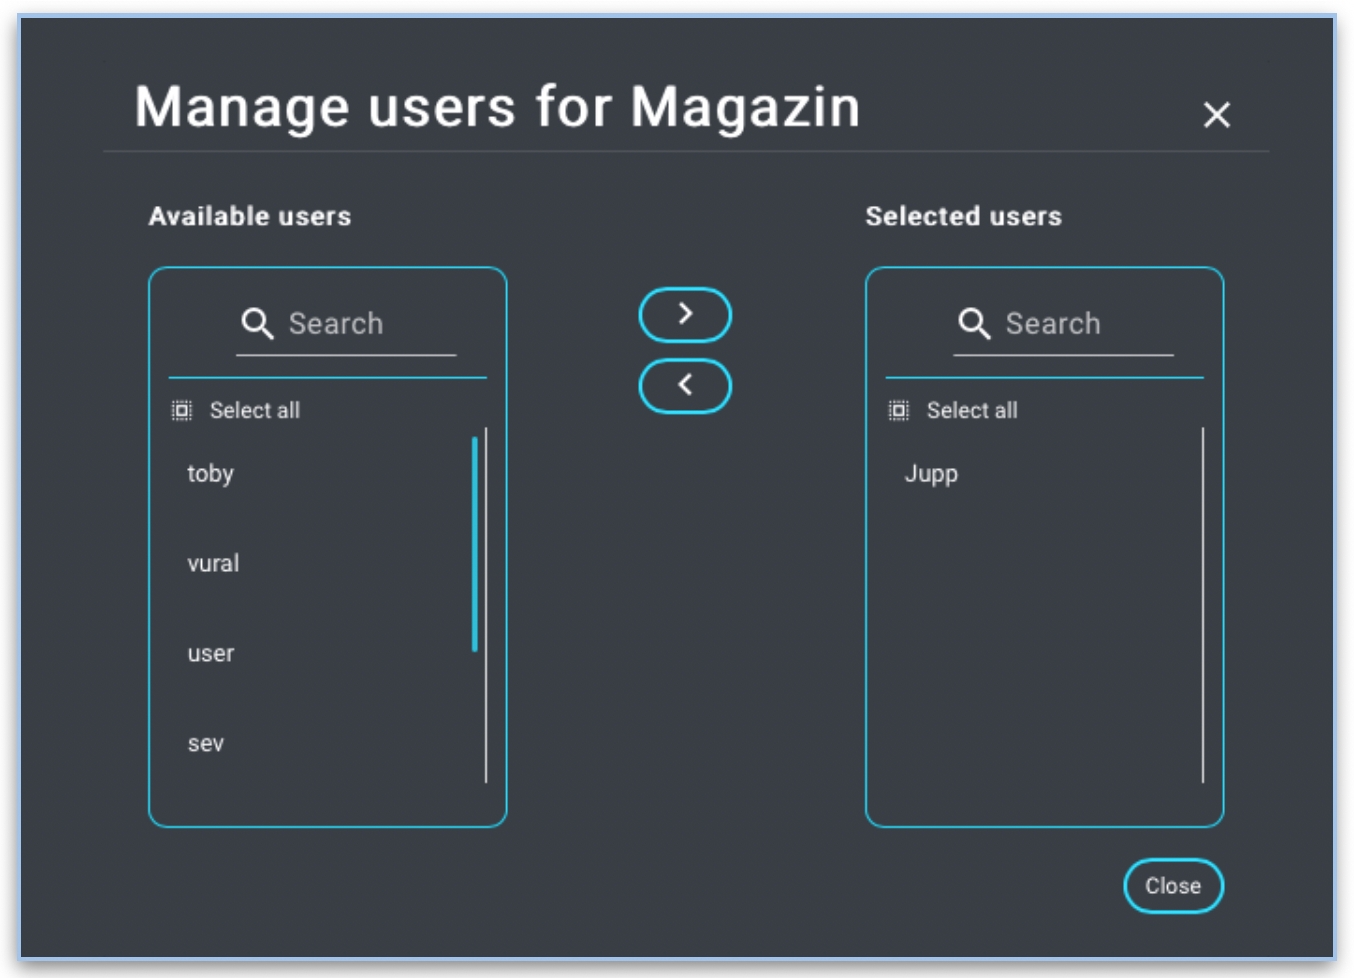
Clicking the 'Manage Users' button will open an overlay window, allowing users to be added to the currently selected group. Individual users, a selection of users, or all users can be added to the chosen group. In the dialog on the left, under "Available Users," users who are not currently part of the group are displayed. Users can be searched for, selected, and added to the group on the right using the arrow keys located in the middle of the dialog. Similarly, users can be removed from the group using the arrow keys. Clicking "Close" concludes the dialogue and saves the changes.
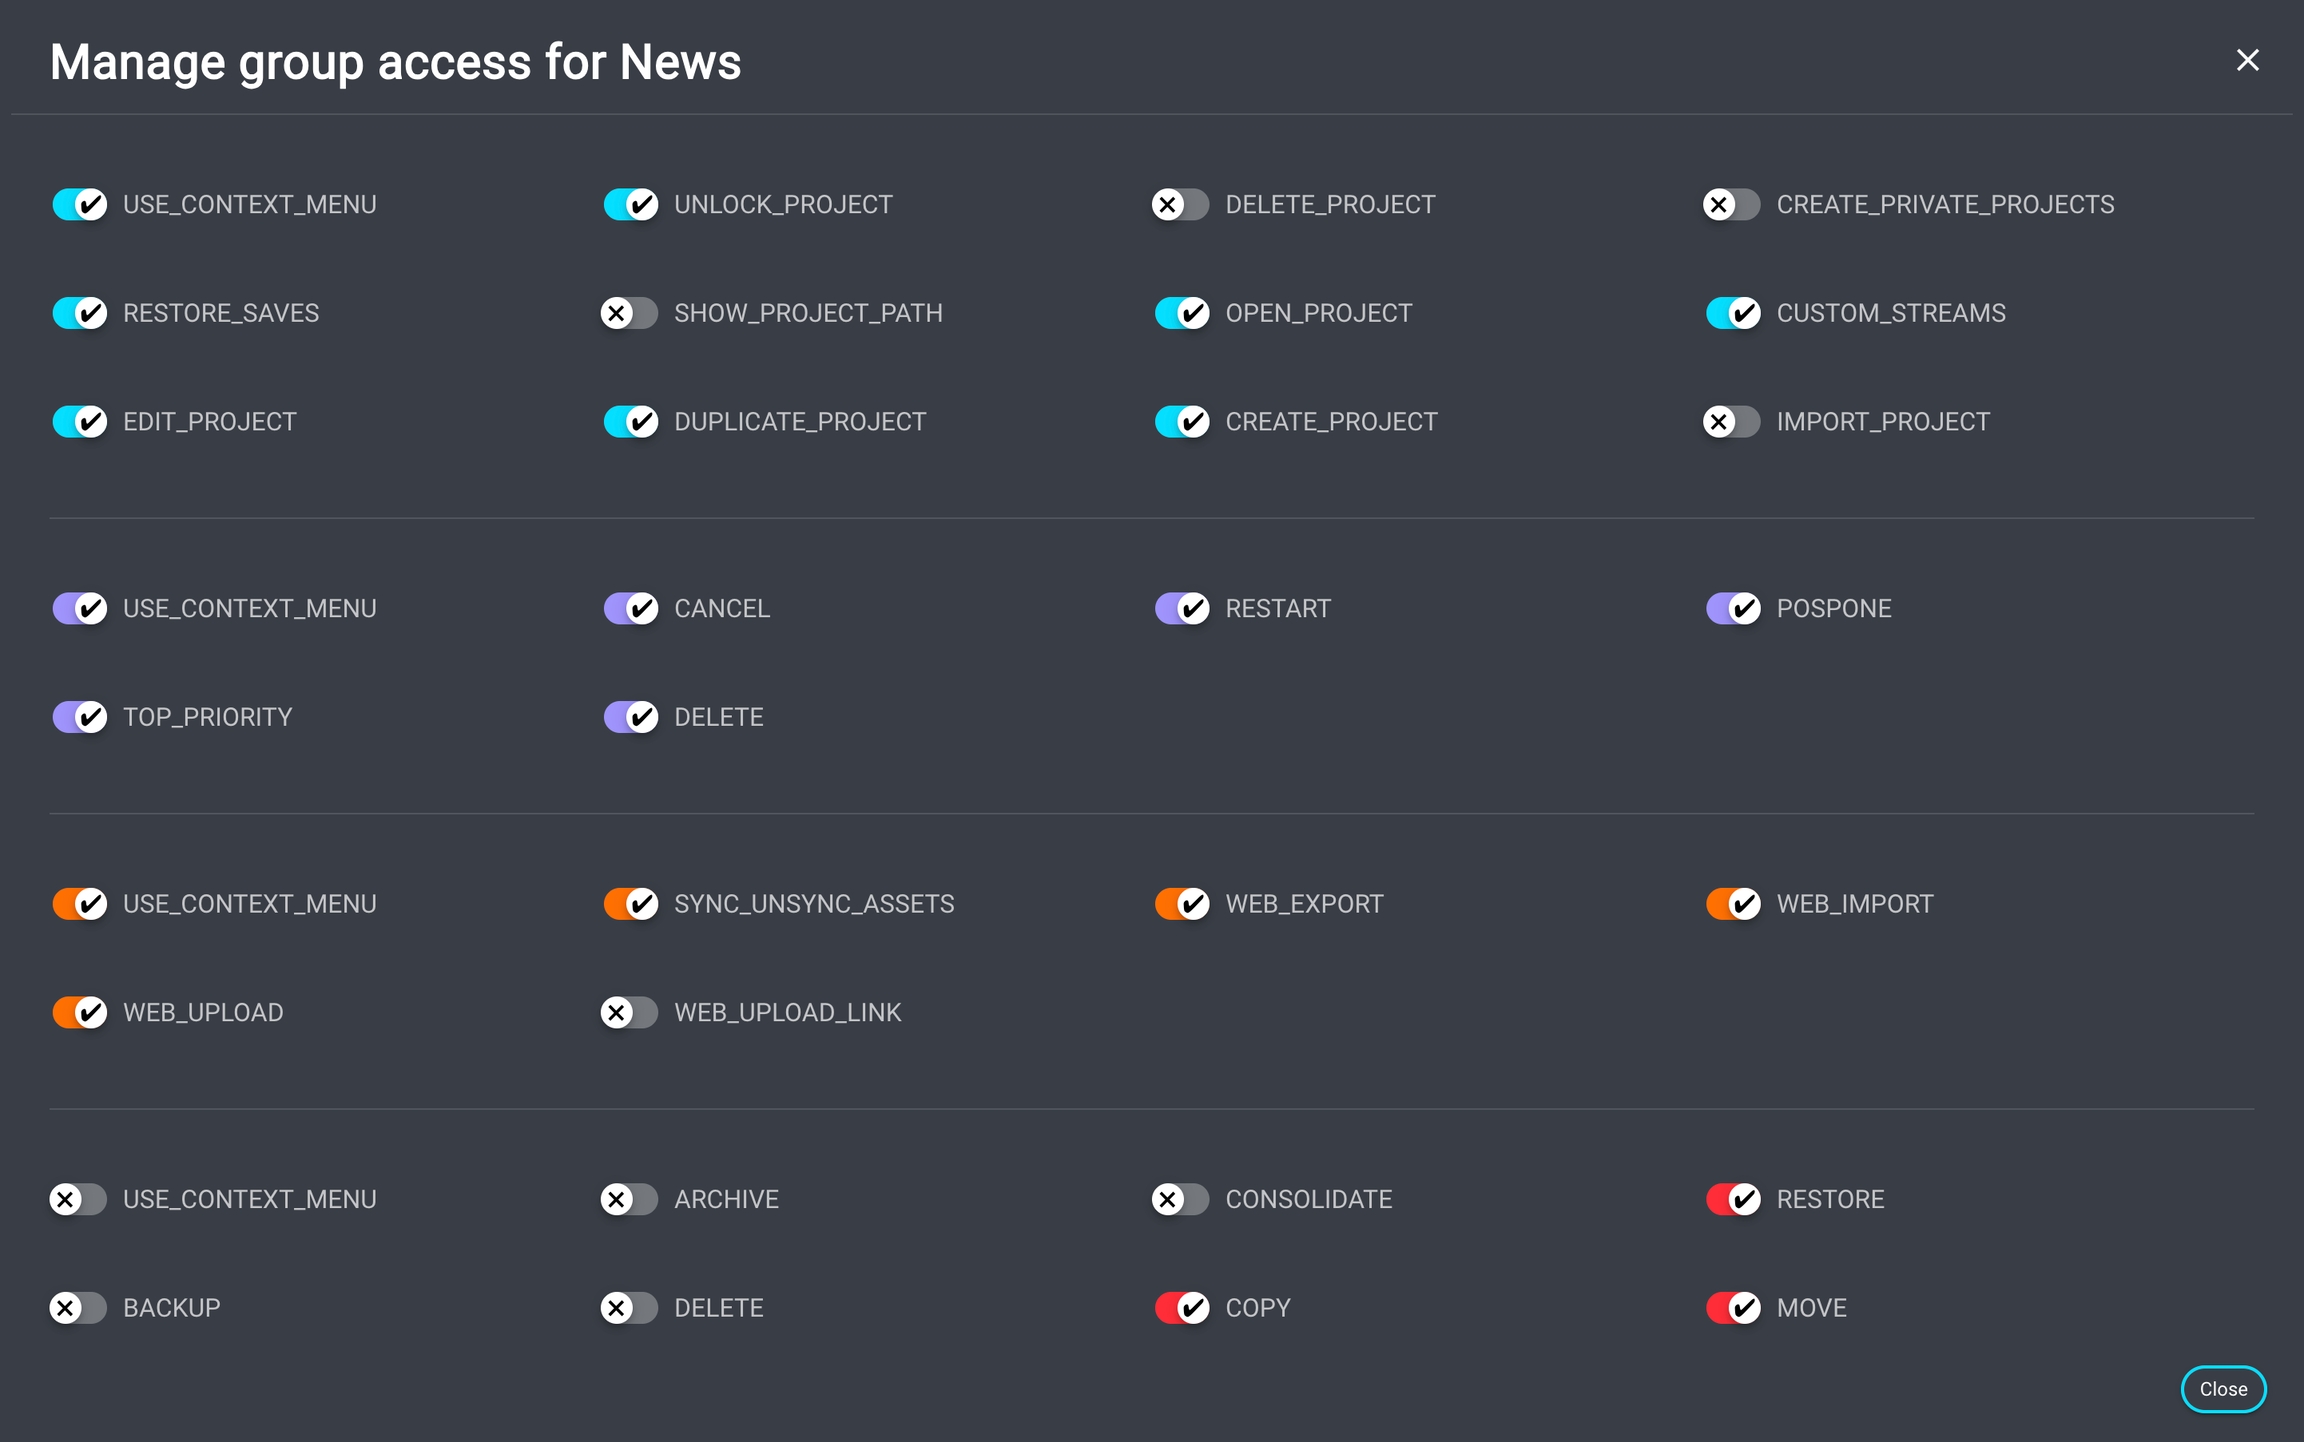
Clicking 'Manage Group Access' will open an overlay window that allows you to set group rights to trigger dedicated actions/triggers.
This setting applies specifically to the group, and you can choose to enable or disable the following functions:
Clicking 'Delete Group' will delete the group, whether there are users still assigned to it or not.
Please be aware that deleting a group may have implications for your network storage location. Verify your existing streams in the Delete_Group trigger to assess potential impacts.
Use the free text search feature to find a user by either their username or display name.
Click the "Add group" button to open an overlay window where you can enter the name of the group you want to create. Once you've entered the name, click "Add" to create the group.
This triggers the 'Create_Group' action, resulting in the creation of a new group's database entry.
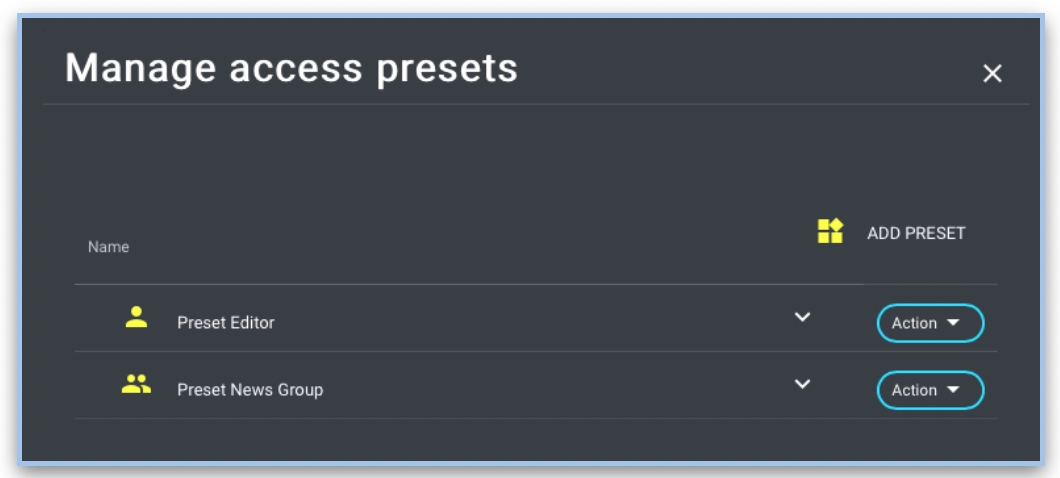
Clicking the 'Access Presets' button will open an overlay window that manages all User and Group Access Presets.
User presets can be assigned individually to a single user or multiple users. It is also possible to utilize a User preset when working with the Active Directory Auto Module.
Similarly, a Group preset can be assigned to any group, performing the same function as setting it manually through the Group Access menu.
Clicking the 'Add Preset' button will open an overlay window where you can define the name and type of the preset, either User or Group.
Clicking "Cancel" or the "x" closes the dialog without saving the preset, while clicking "Save" saves the preset.
This icon indicates that it is a user access preset.
This icon indicates that it is a group access preset.
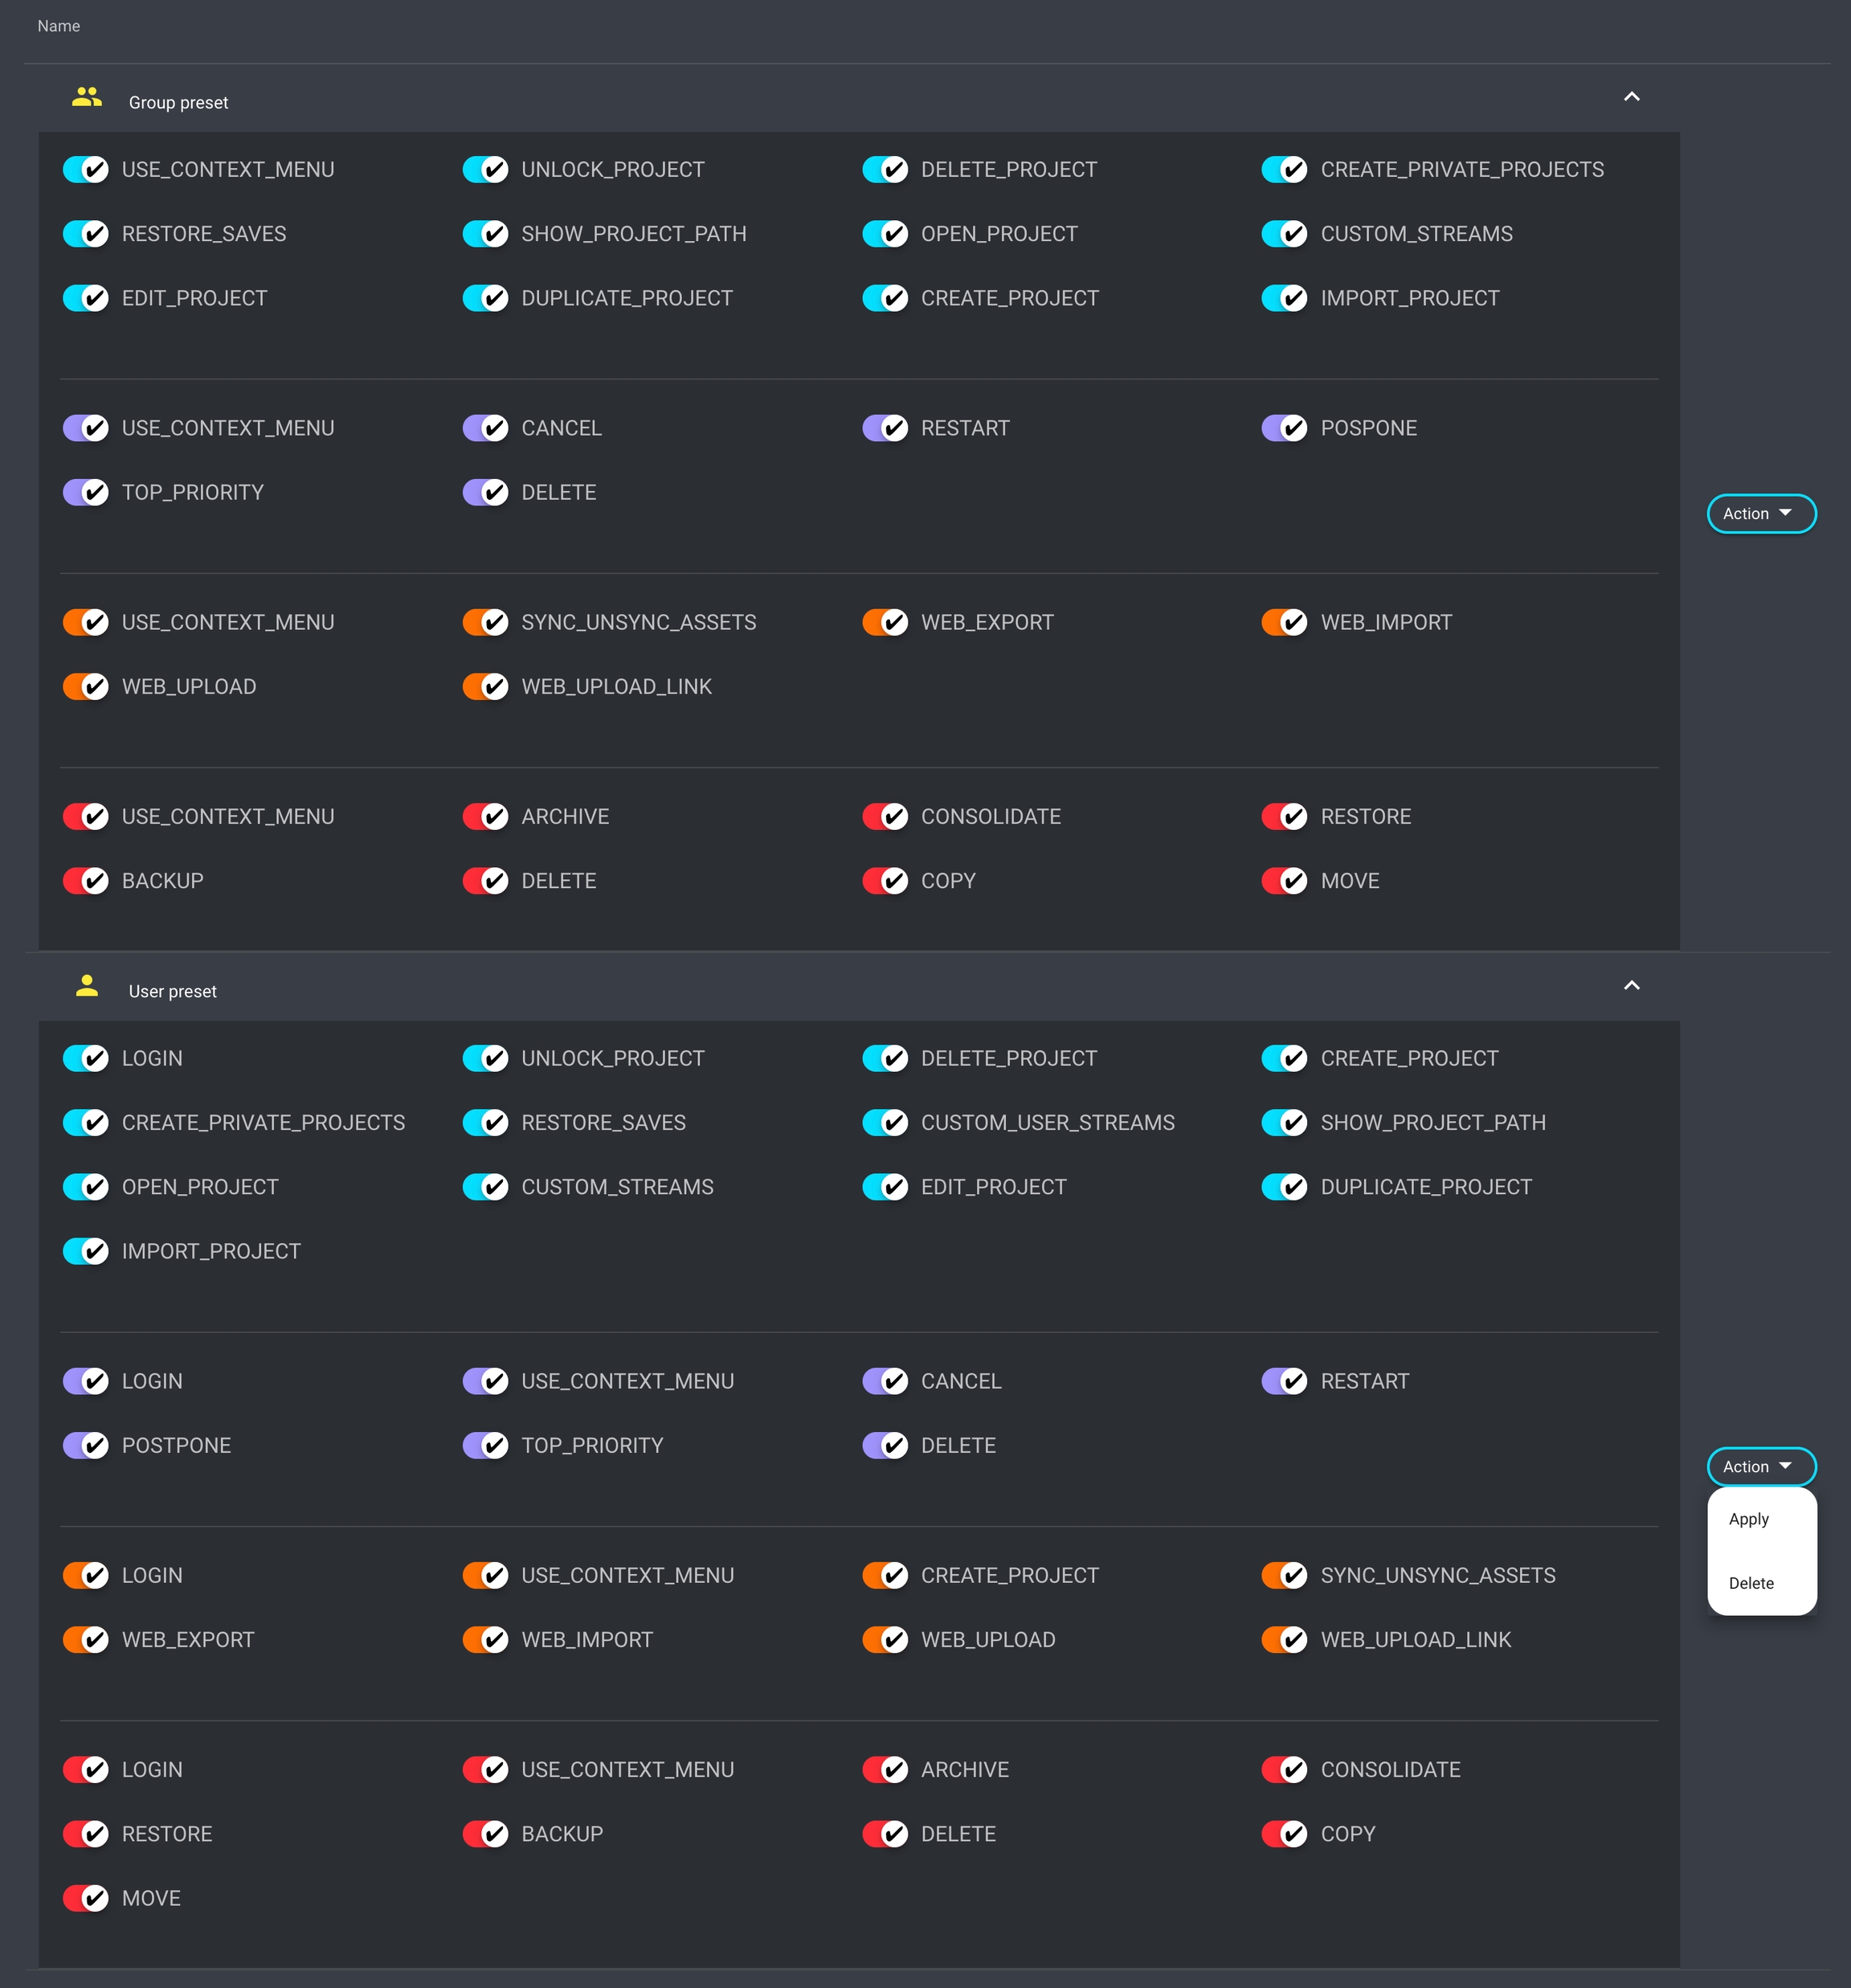
Clicking the unfold arrow or the preset name will display all available access rights in the form of toggle switches. The colors of the individual toggle switches indicate the application for which the function applies.
The Group and User preset options differ to some extent.
It is crucial to note that Group rights take precedence over User rights.
For instance: If a user has the right to delete a project in FX, but Group A has deletion disabled, and Group B has it enabled, the outcome will be that the user can only delete projects in Group B.
Apply: Clicking this button will open an overlay menu for selecting users to whom this preset should be applied. It functions similarly to the Manage Users action.
Delete: This option can be used to remove an existing preset.
Clicking the 'Import User' button opens an overlay window that can be utilized to import new users from an integrated third-party system, such as Active Directory or Flow.
You can find a list of external user and group sources here: External User/Group Sources
It is advisable to set up the dedicated module before initiating the user import process in the Preferences.
In the dialog, under point 1, the source is selected via a dropdown (AD or Flow).
Under point 2, similar to user creation, the corresponding users in the left-hand selection field are displayed and can be chosen to be added to the import tab.
Under point 3, one or more groups and an access preset can optionally be included in the selection of users.
Point 4 displays the progress during the import. A successfully imported user is confirmed with a green tick, while a failed import is indicated by a crossed-out red circle. Hovering the mouse pointer over the symbol reveals a tooltip providing information about the error.
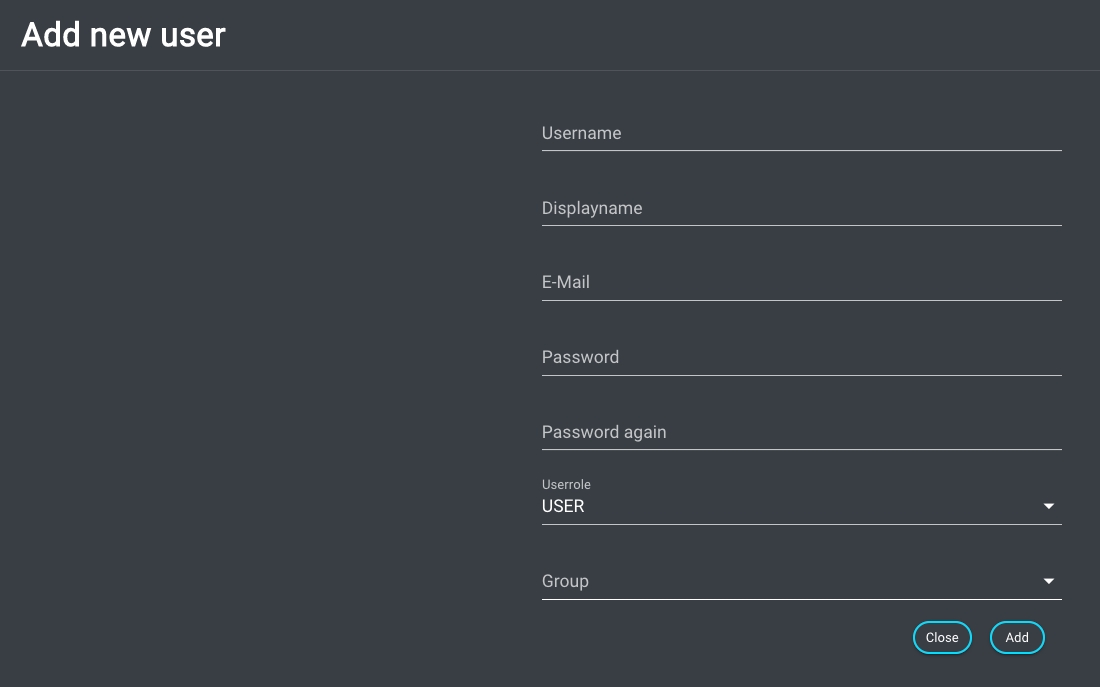
Clicking the "Add User" button will open an overlay window for creating a new user. Within this window, you can specify a user name, display name, email address, password, user role (Admin or User), and group assignment.
The "X" or "Close" button will close the dialog. By selecting "Add," you save the input and create the user.
It's important to note that an Admin user must have a password, while creating a normal user without a password is possible (although not recommended).
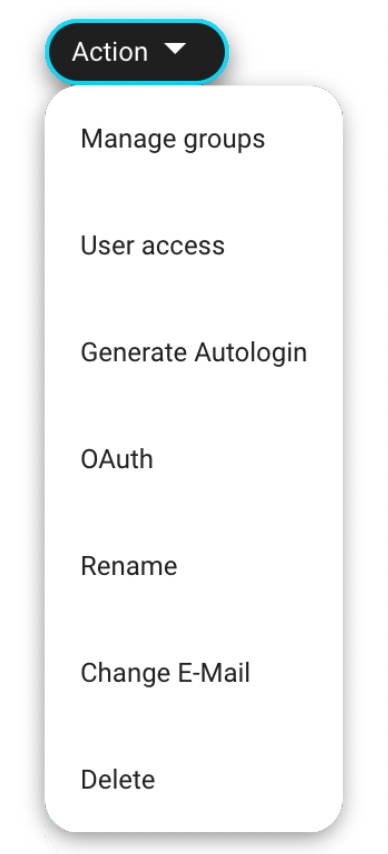
Various actions can be executed within the Action menu like renaming, deletion or changing the access and group permissions.
Users can be renamed, deleted and managed via the "Action" button. Furthermore, it is possible to edit the access preset assigned to the user (user access) and assign the user to one or more teams (manage teams). It bis possible to generate an autologin file that can be stored on a workstation within ~/MoovIT GmbH/ HelmutClient/helmut.auto.login to automatically login the user if the workstation is restarted. Additionally you can assign an email address or change the assigned email address of the user.
Clicking on "Manage Groups" will open an overlay window that allows you to assign or unassign users from any group.
Selecting "User Access" will open an overlay window that enables you to assign or unassign users from various access settings, similar to the functionality of 'Define Group & User presets'.
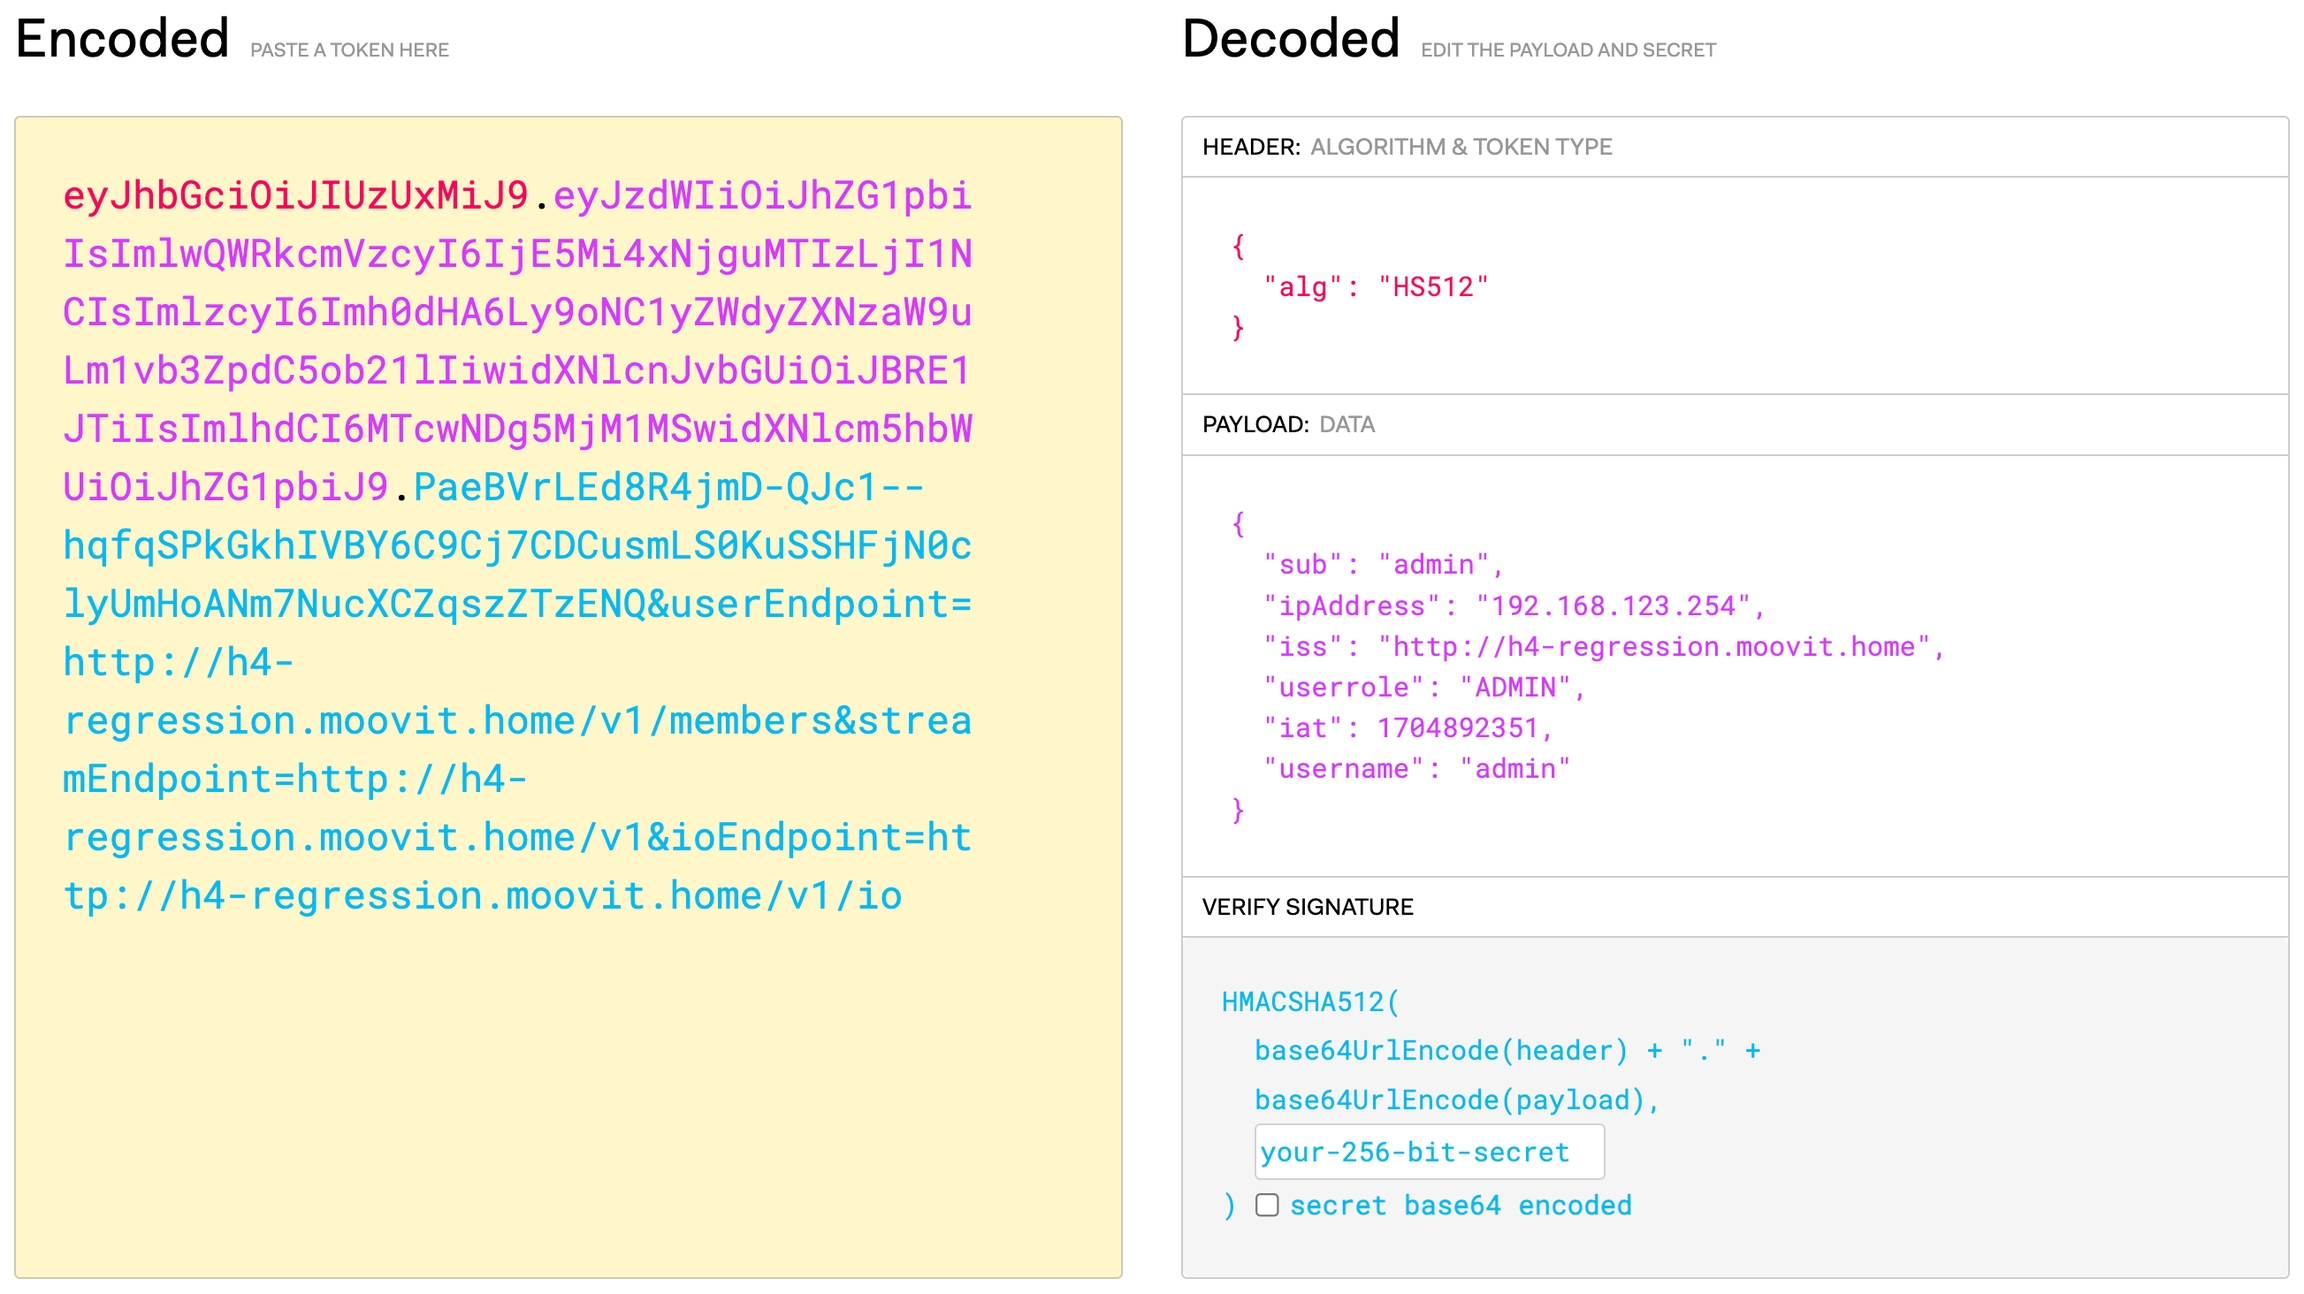
Clicking the button will generate a file named 'helmut.auto.login' on your computer. This file contains a special code, a JWT token, encoded in base-64.
This token is crucial for the Helmut4 client to connect to the server without relying on a web browser.
It's important to know that the token holds the web address where the autologin file was created so keep an eye on the URL while generating the autologin file. This distinction matters, especially with SSL. If you connect via an IP address instead of a DNS name, the connection may be rejected.
For example, if you're on http://192.168.123.4, the token will remember that. If you use http://helmut, the token will store the DNS name.
Autologin files are recommended for Linux clients or unattended render nodes only!
They eliminate the need for a browser to be always connected. However, don't use autologin files for regular user activities, as this can cause issues.
If a client connected through an autologin file tries to open a web browser to log in or connect to the Helmut4 website, there will be a temporary disconnection and reconnection. This might interrupt running jobs.
Use autologins carefully, and be aware of their limitations.
For additional information on how to use an autologin file in a Linux client, please navigate to: Configuring an autologin file
OAuth tokens, in addition to using Bearer tokens, can be employed to log in via the API on behalf of the corresponding user for whom the token was created. This enables integrations where the admin doesn't necessarily have to be the one interacting with the API. Clicking the button opens an overlay window where one or more tokens can be generated. The token's name (Description) can be freely defined.
This button can be used to change the display name of a user.
The username cannot be changed.
This button can be used to change the email address of a user.
This button can be used to delete an user.
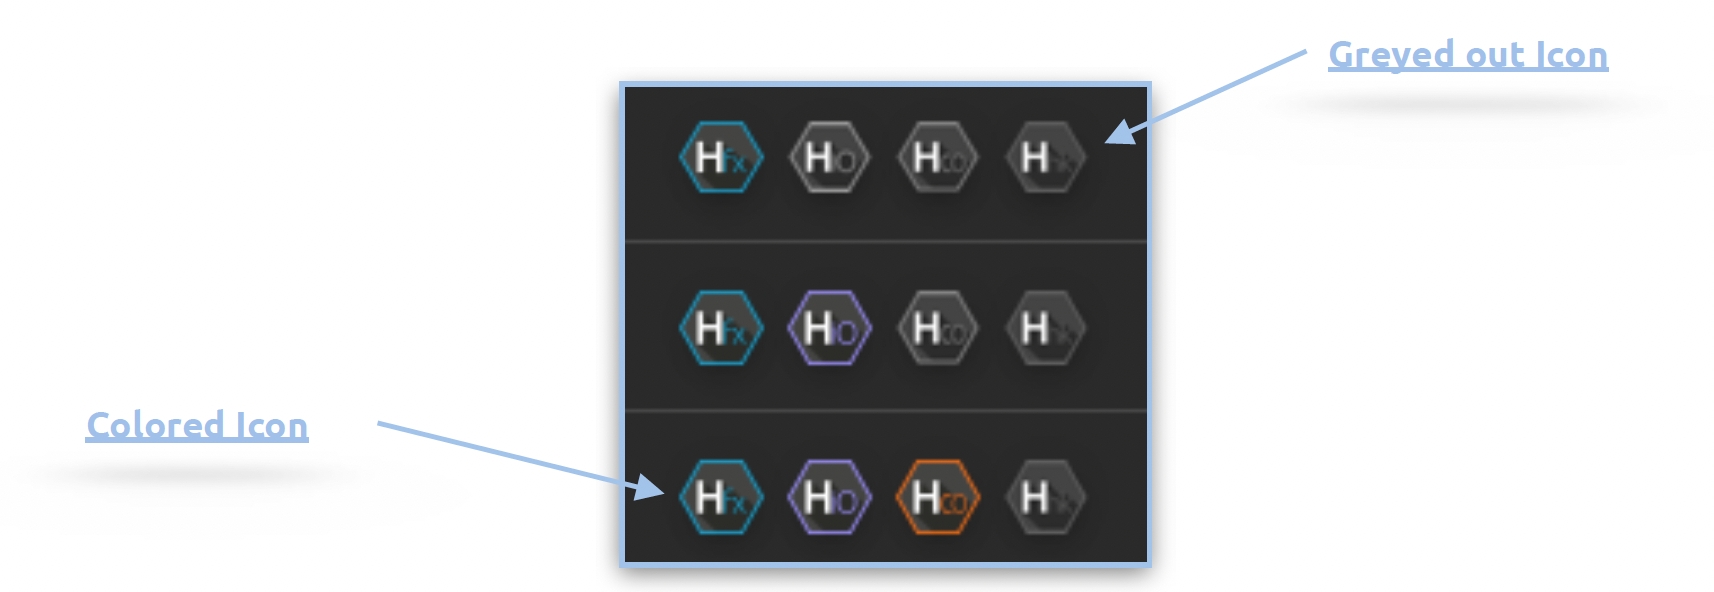
The product selection icons indicate whether the selected user has access to the corresponding product. Access can be modified by clicking on one of the icons. Colored icons signify allowed access, while greyed-out icons indicate no access.
It is possible to reserve or block a license for specific users, and this function is primarily designed for use with render nodes.
When a license is reserved, it is no longer part of the pool of available licenses. Unfortunately, there is no additional information provided on whether the license is in use, regardless of whether the client is logged in or not.
The advantage of reserving a license is that the corresponding user can log in and out, and the assigned license cannot be used by another user. This guarantees that you won't encounter login issues because all licenses are in use.
This simplifies the management of render nodes that are automatically controlled for IO, CO, and HK jobs.
The 'Role' dropdown allows you to modify the user role of the selected user.
The available options are Admin or User.
Note that there is no user role designated as a "super-user." However, a similar function can be achieved by assigning extended user access rights. For more details, please refer to User access.
