Add CO Profile
Overview CO Profile
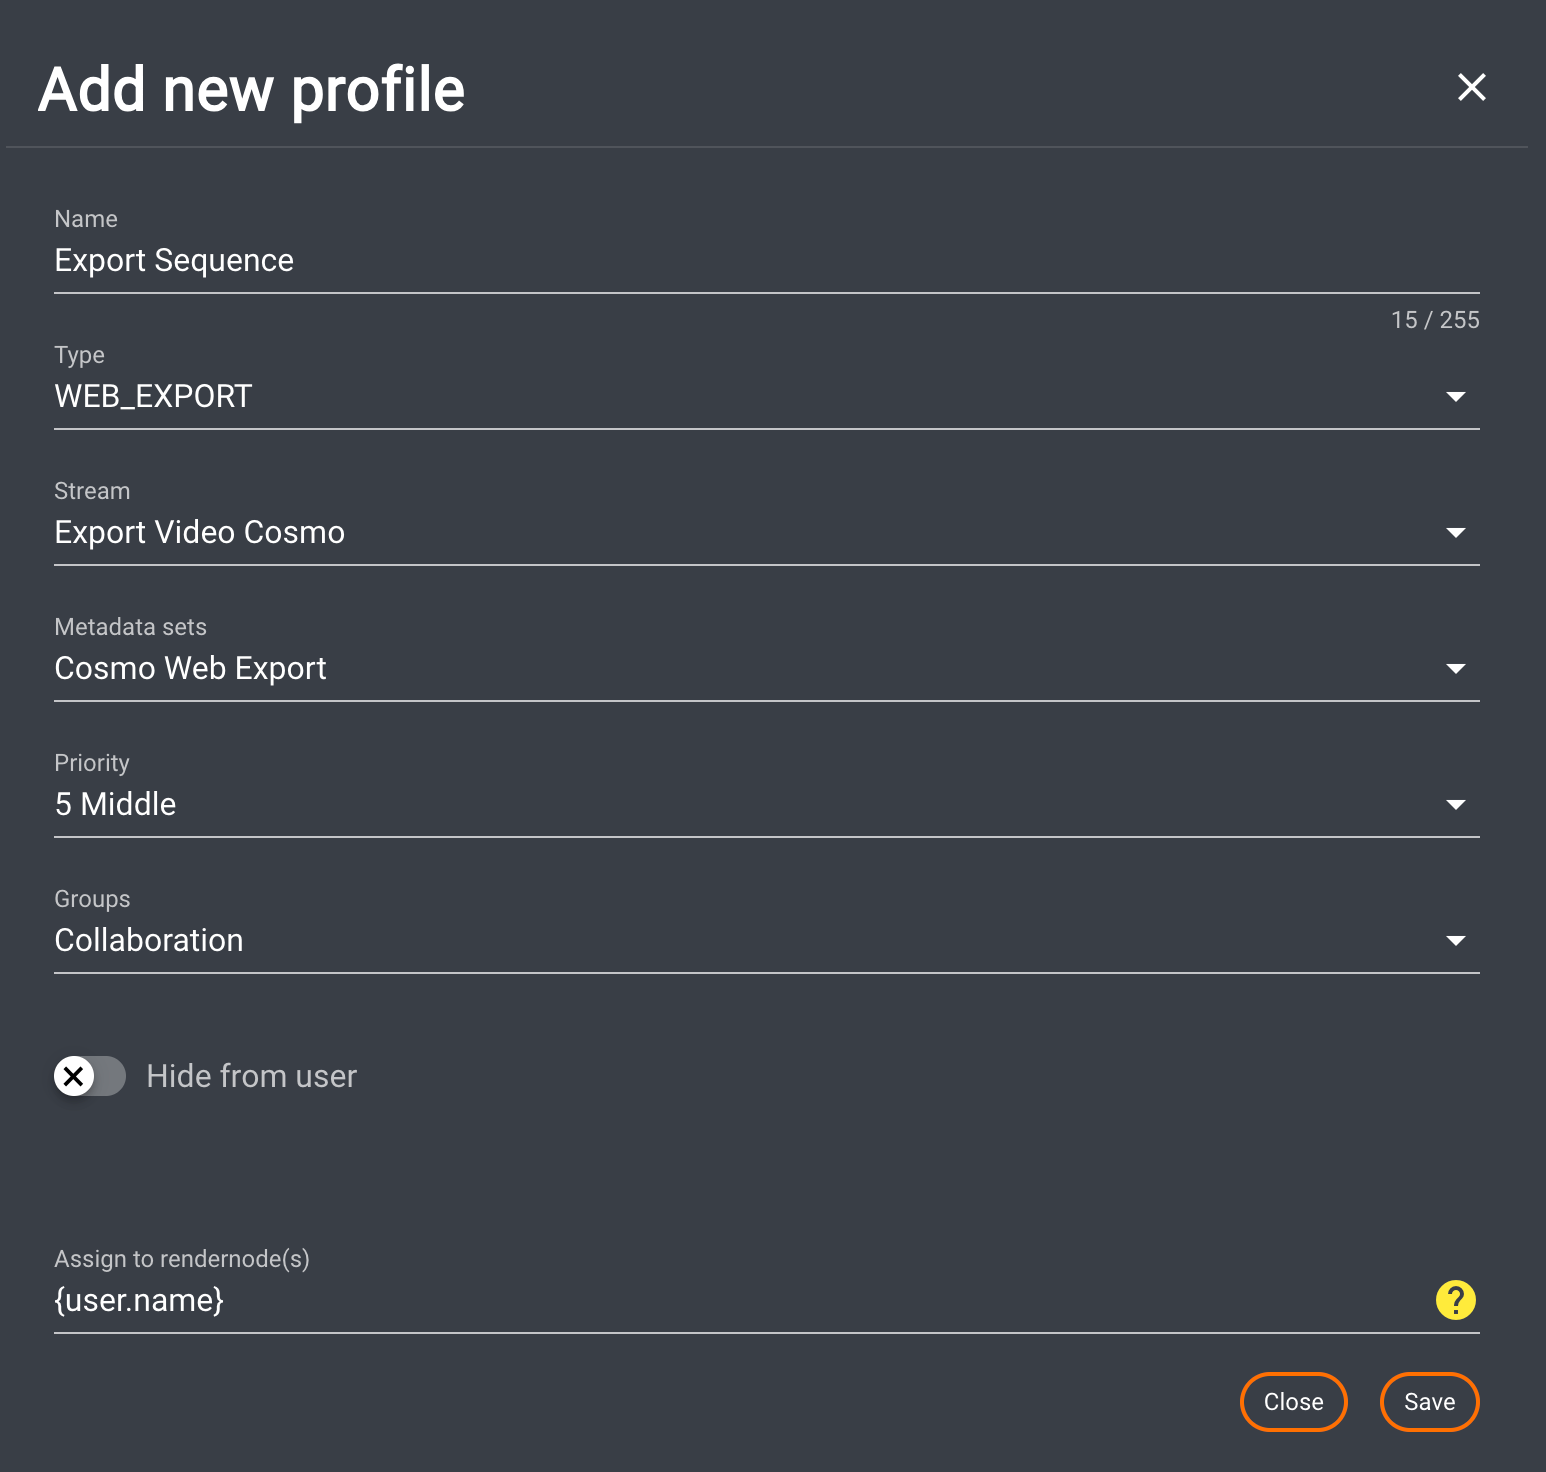
Click the “Add new profile” button to open a new dialog box used to define the profile parameters.
CO Profile Differences
The difference between the profile dialog in CO compared to IO is as follows:
There is no option to add a pre-stream definition

CO Profile Configuration
Profile Name
Free-text field for defining the name of the profile.
Stream Type
Selection box for defining the stream type to be used in the profile. Selecting a type filters the available streams by type.
Stream Name
Dropdown menu to select the desired stream. All previously created streams under the menu item "Streams" are displayed here and can be selected.
Metadata Set
Dropdown menu to select the desired metadata set.
All previously created metadata sets under the menu item 'Metadata' are displayed here and can be chosen.
Metadata Order for Metadata Set
Please refer to Metadata Order for Metadata Set for further information.
Priority Assignment
A dropdown menu to select the desired priority for the profile. By default, the priority is set to 5 (middle) and can be set in the range of 1 to 10, with 1 being the highest and 10 being the lowest priority.
The priority defines the rank of the job in relation to the render nodes stored in the profile. For example, if there are two profiles and all existing render nodes are entered in both profiles, all jobs created with a profile that has a higher priority are processed preferentially.
Group Assignment
A dropdown menu to select the desired group(s). All previously created groups under the menu item "Users" are displayed here and can be selected. If one or more groups are chosen, the profile is available only to these groups.
Hide from user
Because a profile is visible in all groups if it is not assigned to any group, it is possible to hide a profile from the user.
This feature enables the hiding of a profile that is triggered via a Job Create Job Action.

Render Node Assignment
A free text field for defining the name of the render node(s) that should process the jobs created with this profile. Different ways to define these render nodes are available:
Processed by the local workstation: To automatically assign every job to the user who has created it, you can use the wildcard {user.name} or {job.user.name}. This wildcard is automatically replaced by the username and transferred from the server to the workstation via the client connector.
Processed by a dedicated user/render node: To assign a job to a specific user or a dedicated render node, regardless of whether or not they created the job, enter the user's name.
Example: “user1” or “rendernode 1”
Processed by one user of a group: To assign a job to multiple users or render nodes, regardless of who created the job, enter the names of all users here. The next available user will automatically start processing the job. Enter usernames separated by a comma without any blank space (Example1).
Example1: user1,user2,user3,rendernode1,rendernode2
Alternatively, it is possible to assign jobs to a group of users that start with dedicated letters.
Example2: user* or render*
Make sure you are using appropriate wildcard names, such as "amerender*" instead of "ame*," as the latter could include a user named james.
Processed by any available user: Leave this filed blank
Save/Cancel Button
Clicking "Save" closes the dialog and saves the profile.
Clicking "Cancel" or the "X" closes the dialog without saving.