Open API
Overview
Helmut4 follows an API-first approach, where the entire UI is built on our API. In instances where you wish to automate or integrate Helmut4 with other third-party systems, our open API proves invaluable, providing an extremely powerful set of functionalities.
If you have any questions regarding the use of our OpenAPI, please reach out to our support team via the support portal for assistance. Please be aware that the current accessible API definition is always referring to the latest Helmut4 release. http://docs.helmut.de/helmut4-releases/getting-started/open-api
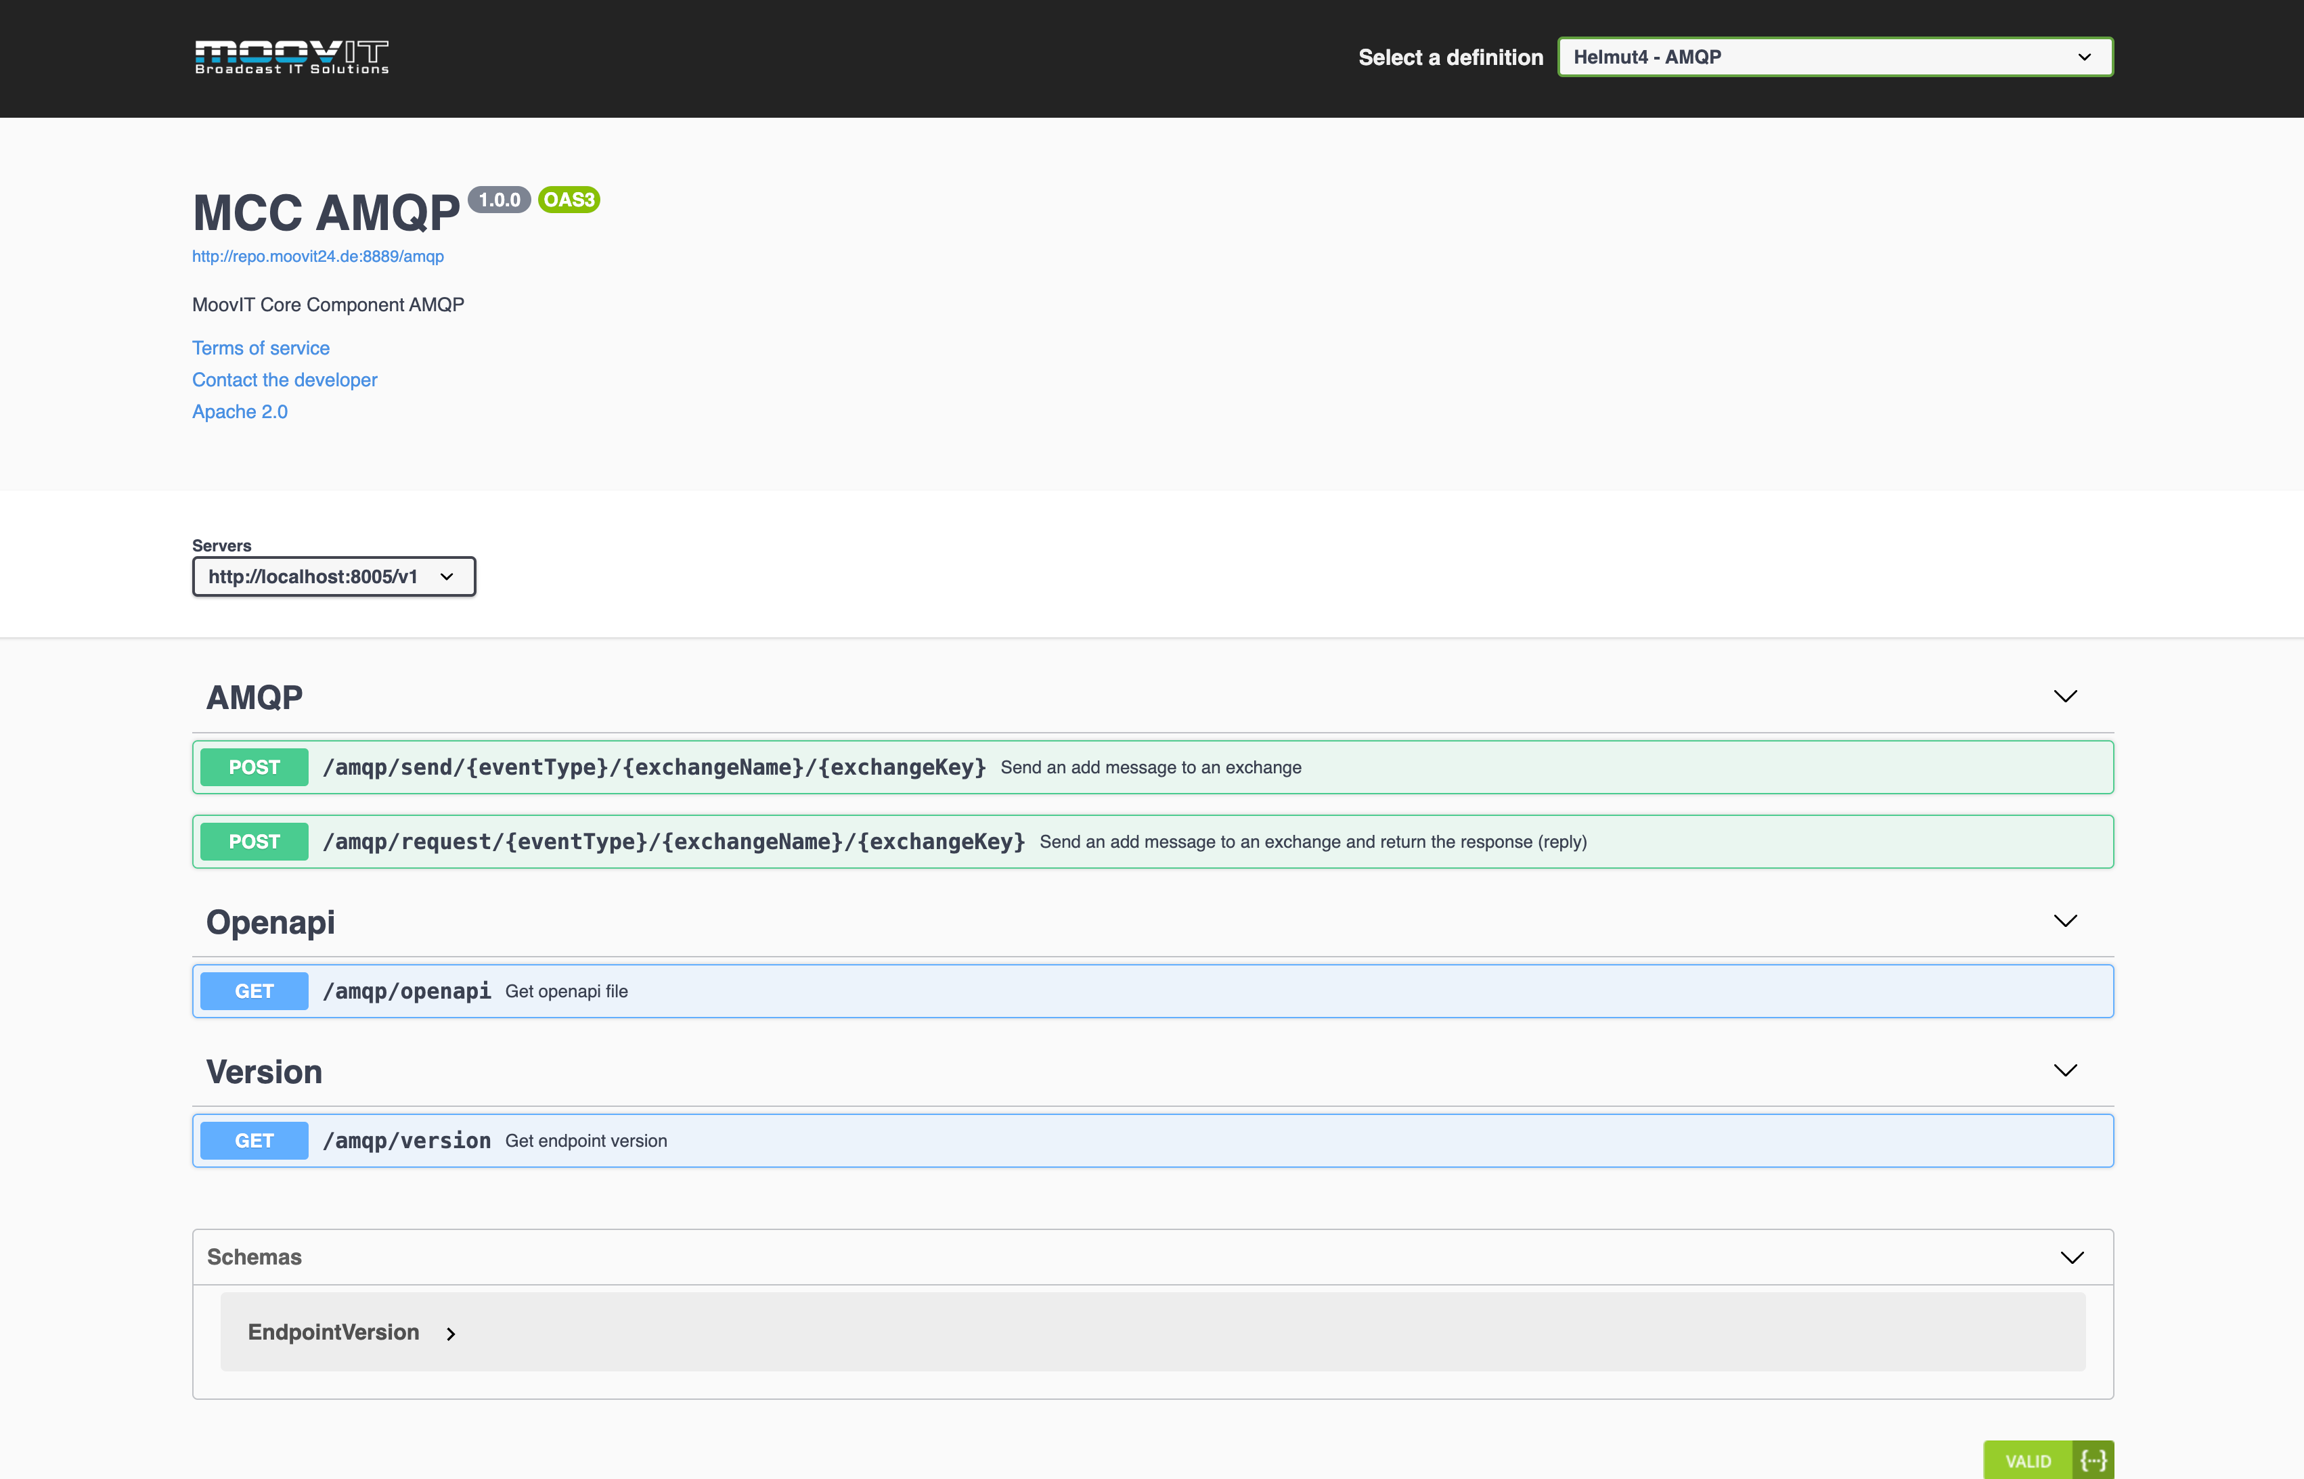
API Documentation - Swagger UI
The link to our OpenAPI documentation can be accessed here

Authentication
There are several ways to communicate with the helmut4 API.
All options are listed below in an alphabetically list - choose the one which will meet you demands as it's best.
Basic Access Authentication
Basic Access Authentication, commonly known as Basic Auth, is a straightforward method used to authenticate clients when accessing an API. This method requires users to provide a username and password, which are combined into a single string and encoded using Base64 before being sent in the HTTP header. Here’s a deeper look at how it works and some important considerations:
Explanation Basic Auth
How It Works:
When a client makes a request to a server-protected resource, the server responds with a
401 Unauthorizedstatus along with aWWW-Authenticateheader indicating that Basic Auth is required.The client then resends the request, including an
Authorizationheader that contains the encoded credentials in the format:The server decodes the credentials and verifies them against its authentication store.
Simplicity and Ease of Use:
Basic Auth is widely supported and easy to implement.
It does not require additional tokens or session management, making it a good choice for quick integrations or low-complexity scenarios.
Security Considerations:
Encryption: Basic Auth only encodes credentials using Base64, which is not encryption but merely an encoding method. As such, it does not provide security by itself.
Transport Layer Security: To prevent interception of credentials, it is essential to use Basic Auth over secure channels (HTTPS).
Exposure Risk: Without proper transport security, credentials may be exposed to potential attackers through man-in-the-middle attacks.
Bearer Authentication
Bearer Authentication is a token-based security mechanism that protects API endpoints by requiring clients to present a valid token with each request. Here’s an expanded explanation of how it works and key considerations:
Explanation Bearer Token
How It Works:
Token Issuance: A client first obtains an access token—typically after a successful login or through an OAuth 2.0 flow—from an authentication server.
Token Usage: The client then includes this token in the HTTP header for each API request in the following format:
Server Validation: Upon receiving the request, the server verifies the token’s validity and permissions before granting access to the requested resource.
Simplicity and Efficiency:
Stateless Authentication: Bearer tokens eliminate the need for server-side sessions by embedding the authentication state within the token itself.
Ease of Integration: This method is widely adopted and supported by many frameworks and libraries, making it a popular choice for both mobile and web applications.
Security Considerations:
Secure Transmission: Always use HTTPS when transmitting bearer tokens to protect against interception by malicious actors.
Token Expiration and Revocation: Tokens should have an expiration time to reduce the risk of misuse if compromised. Implementing a token revocation mechanism is also recommended for additional security.
Scope and Permissions: Ensure tokens are granted only the necessary permissions, following the principle of least privilege, to minimize potential damage if a token is leaked.
Storage Security: Store tokens securely on the client side (e.g., in secure HTTP-only cookies or secure storage mechanisms) to prevent unauthorized access.
Options to retrieve a Bearer Token
There are several methods for obtaining a Bearer token from helmut4. Below are three common approaches:
Using Browser Developer Tools
Access the Developer Tools: Most modern browsers allow you to open the Developer Tools by pressing F12.
Monitor Network Traffic: Navigate to the Network tab. Then, either switch to another section of the application (e.g., the Projects tab) or reload the website.
Locate the Token: Multiple network requests will be listed. Look for entries that include an Authorization header. The Bearer token will be visible as part of these requests. You can inspect these entries to copy the token.

Using an Autologin File
Open the Autologin File: Locate an existing autologin file or create a new one if needed.
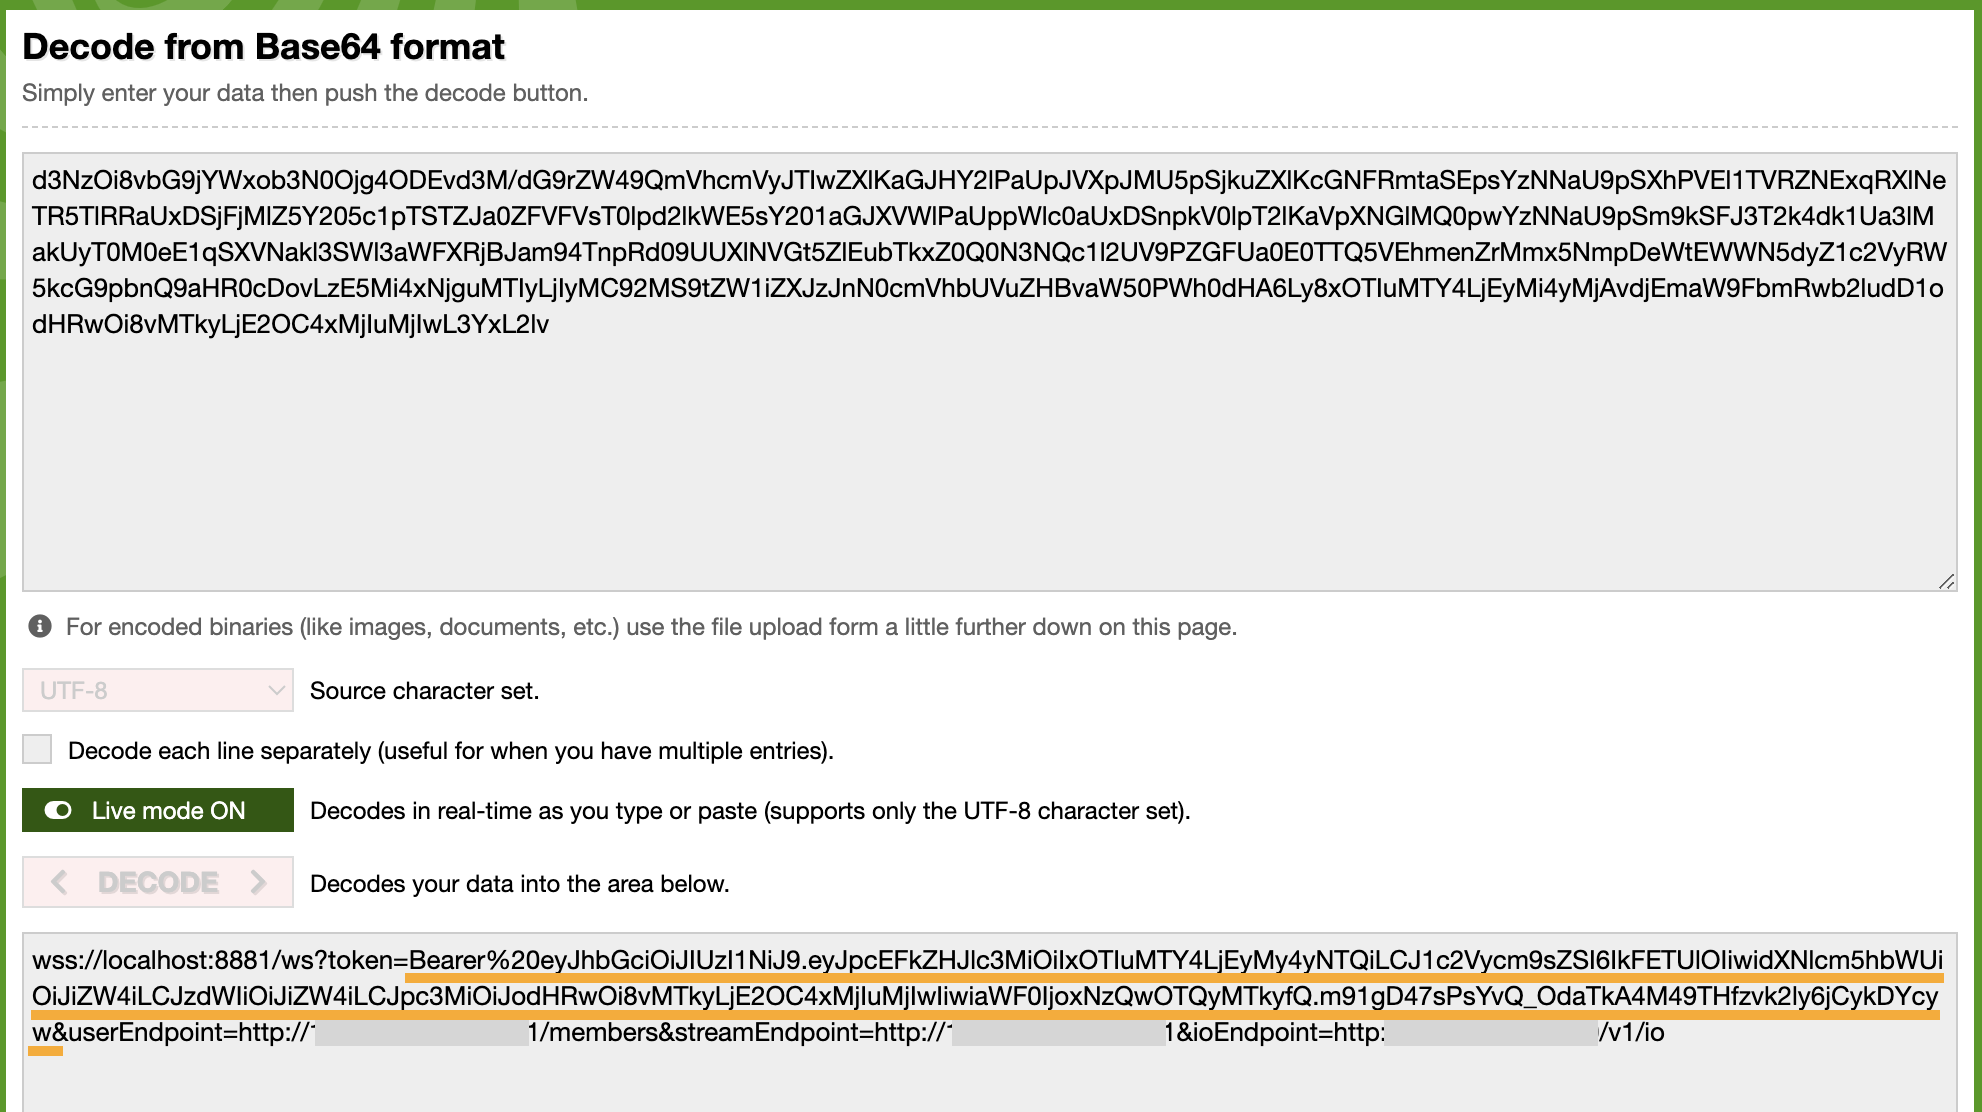
Decode the File Content: Copy the contents of the file and paste them into a Base64 decoder (for example, Base64Decode.org).
Extract the Token: The decoded output will include a JWT (JSON Web Token) that contains the Bearer token. Note: If you encounter
%20in the decoded string, remember that it represents an encoded whitespace character. Replace it with an actual space if needed.

Using OAuth to Retrieve a Bearer Token
OAuth offers a secure and standardized way to obtain a Bearer token for each user. Similar to using an autologin file, an OAuth key/secret pair can be generated for every user, allowing dedicated access via the API.
OAuth Key/Secret Generation: Each user is assigned a unique OAuth key and secret. These credentials are used to authenticate against the helmut4 API.
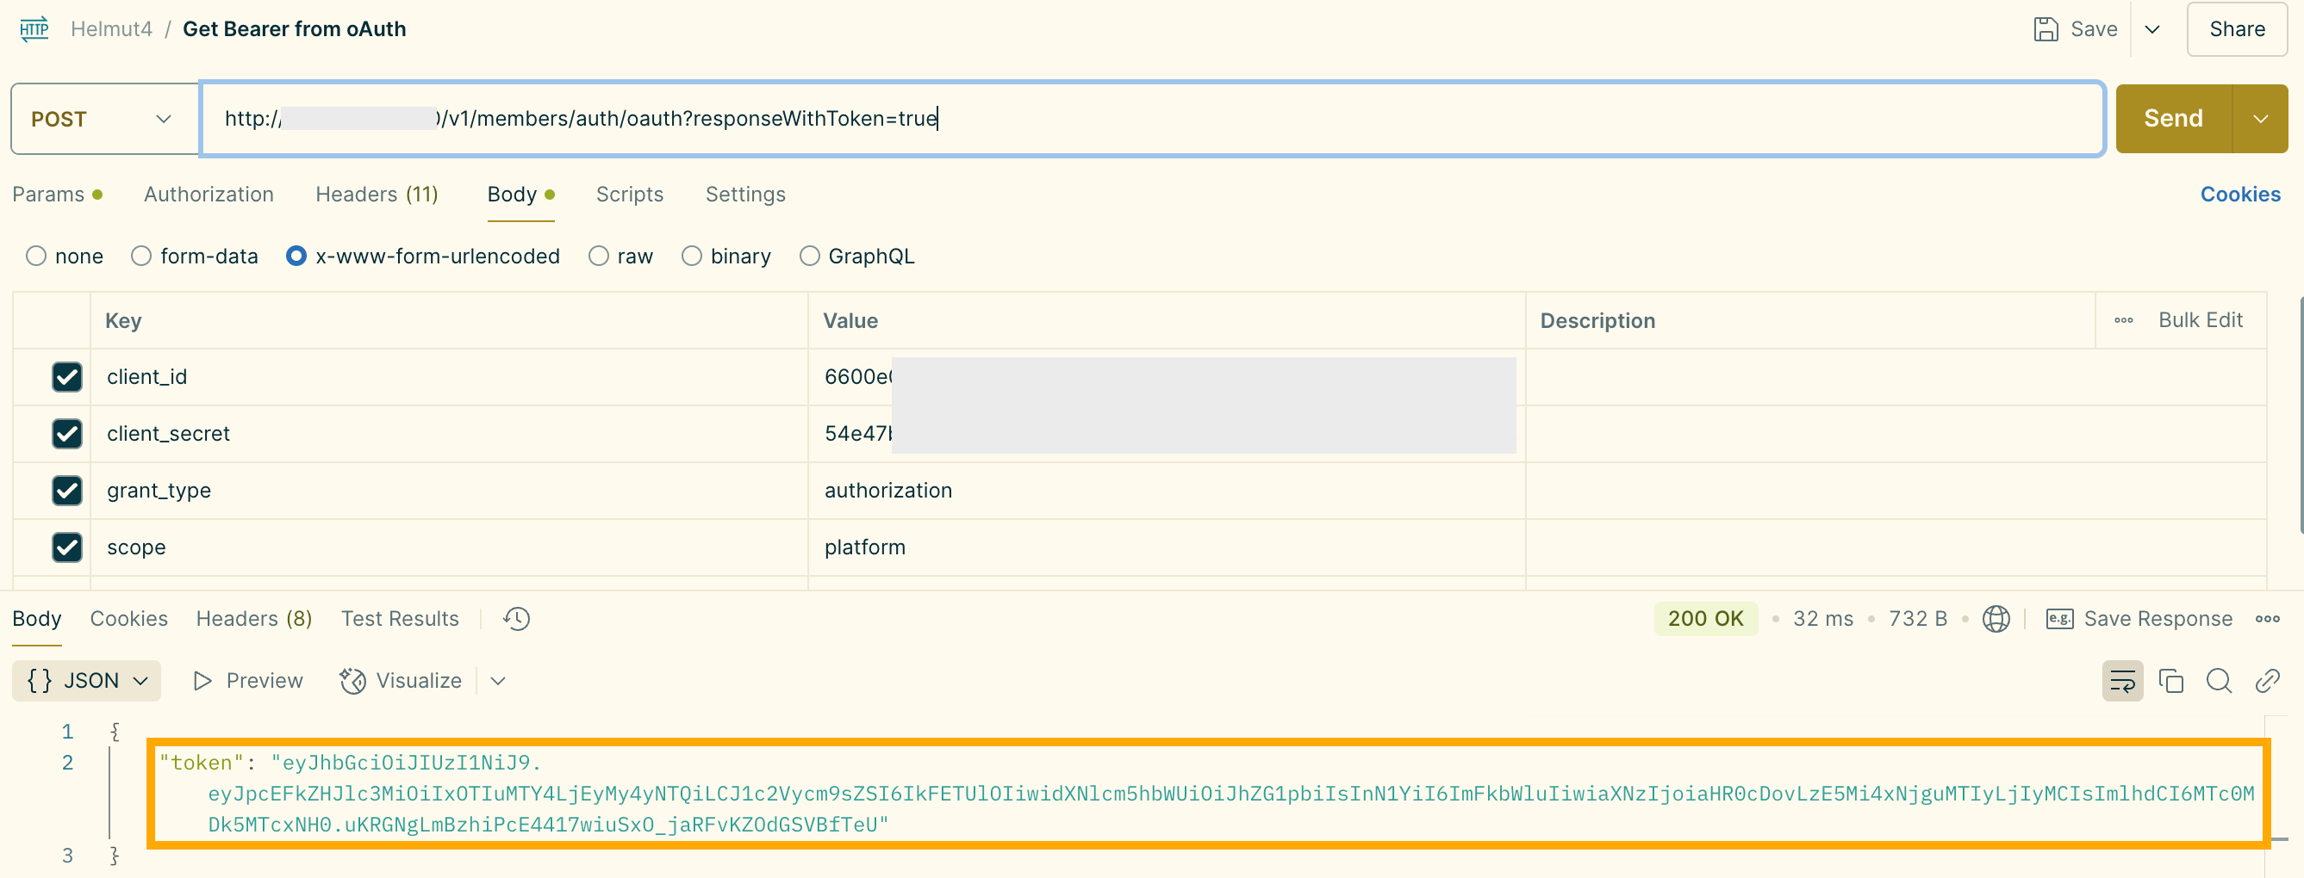
Requesting the Bearer Token: To retrieve the Bearer token, you can make a POST request to the helmut4 OAuth endpoint. The endpoint processes the OAuth key/secret, and if the credentials are valid, returns a Bearer token specific to that user.
Request Bearer token via oAuth authentication
Endpoint Details
HTTP Method: POST
Base URL: <ip-address>
Path:
/v1/members/auth/oauth?responseWithToken=true
Request Headers
Content-Type: application/x-www-form-urlencoded
Request Body
The body of the request should include the following URL-encoded parameters:
client_id: Your OAuth Client ID.
client_secret: Your OAuth Client Secret.
grant_type: Set to
authorizationto indicate the type of OAuth flow.scope: Specifies the access privileges; in this case, it is set to
platform.
The helmut4 API will validate the provided credentials and if the credentials are correct, the API will respond with a Bearer token.
