Layout
Overview
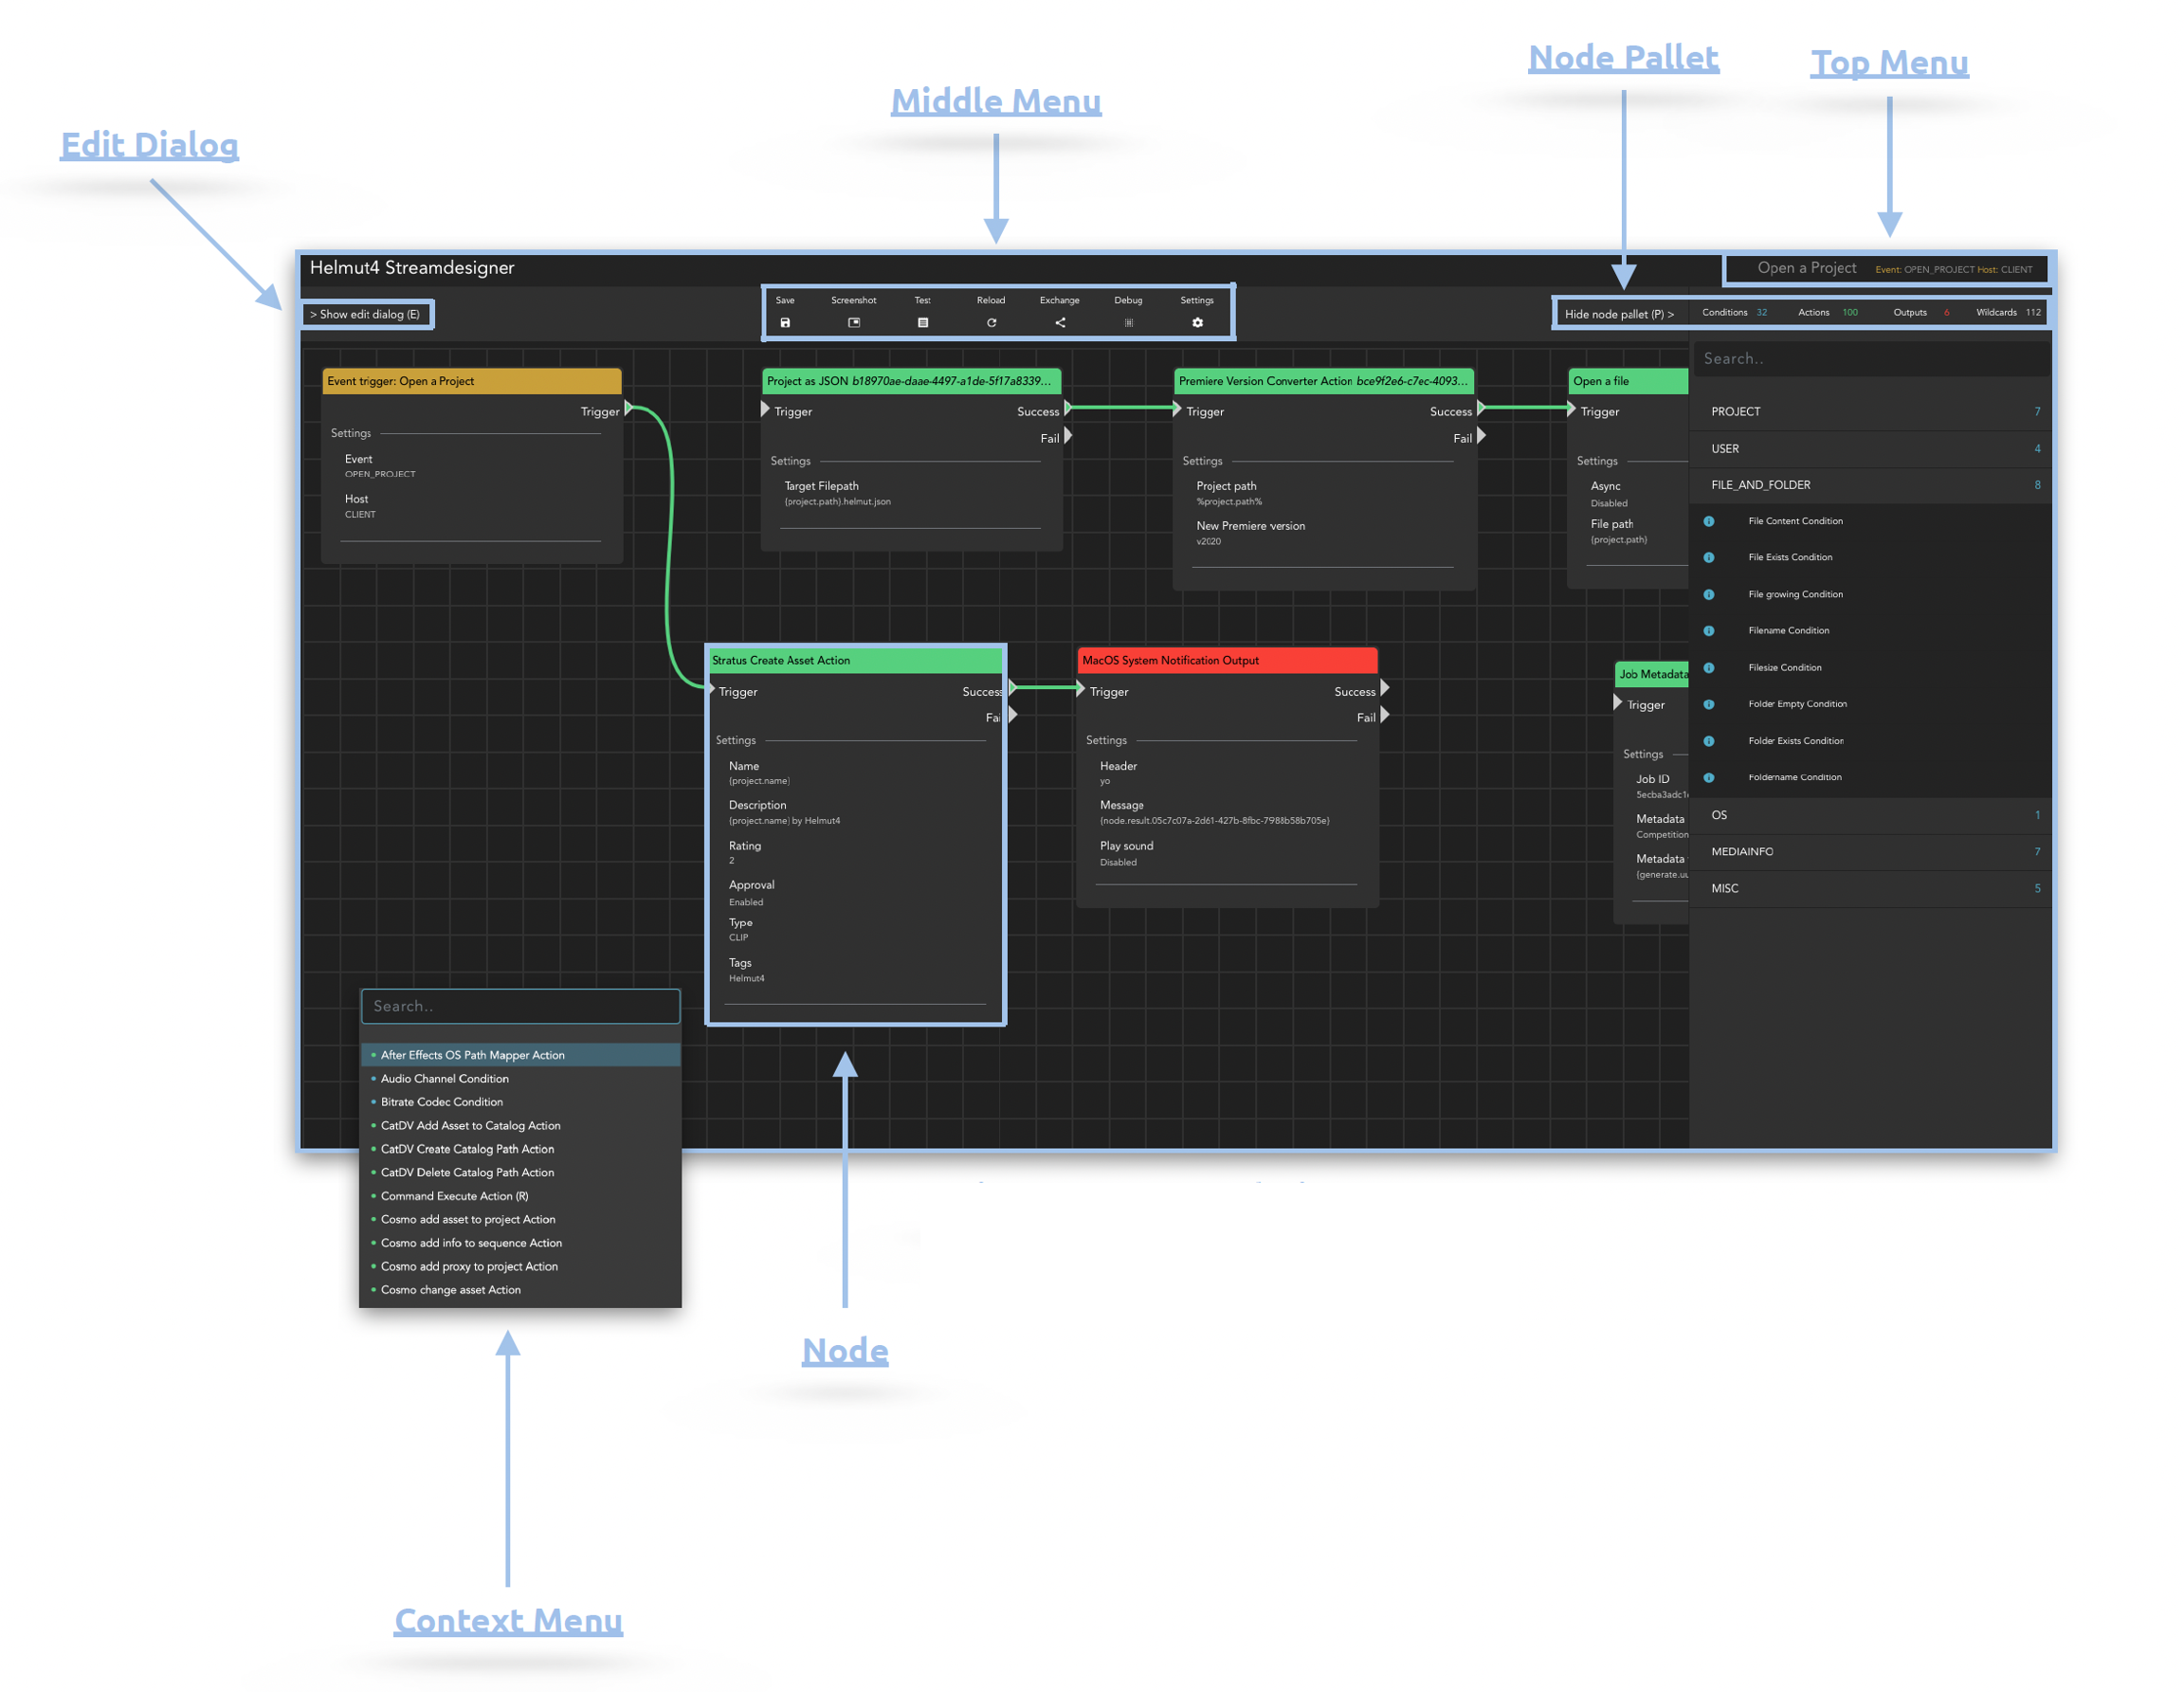
The Streamdesigner is the configuration interface for Streams (workflows) in Helmut4. Streams are triggered by manual or automated events and will be execute on either the server or a client. It’s not a workflow engine but a workflow configurator. Always starting with a „Event Trigger“ node, conditions, actions and outputs can be chained together to create powerful and flexible workflows that handle successful or failed results.
The output of a node can be connected by clicking and dragging with the mouse to the input trigger of a node. To make this easier, and because each node has only one input, it is possible to drag the wires to the desired node and release them there. The connection with the input trigger is set automatically
Functionality
In the very top, you can find the name of the currently opened Stream, an icon to copy the Stream ID, and next to it you will find the event that will trigger this stream. Additionally it shows whether the Stream will run on the server or a client aka the host.

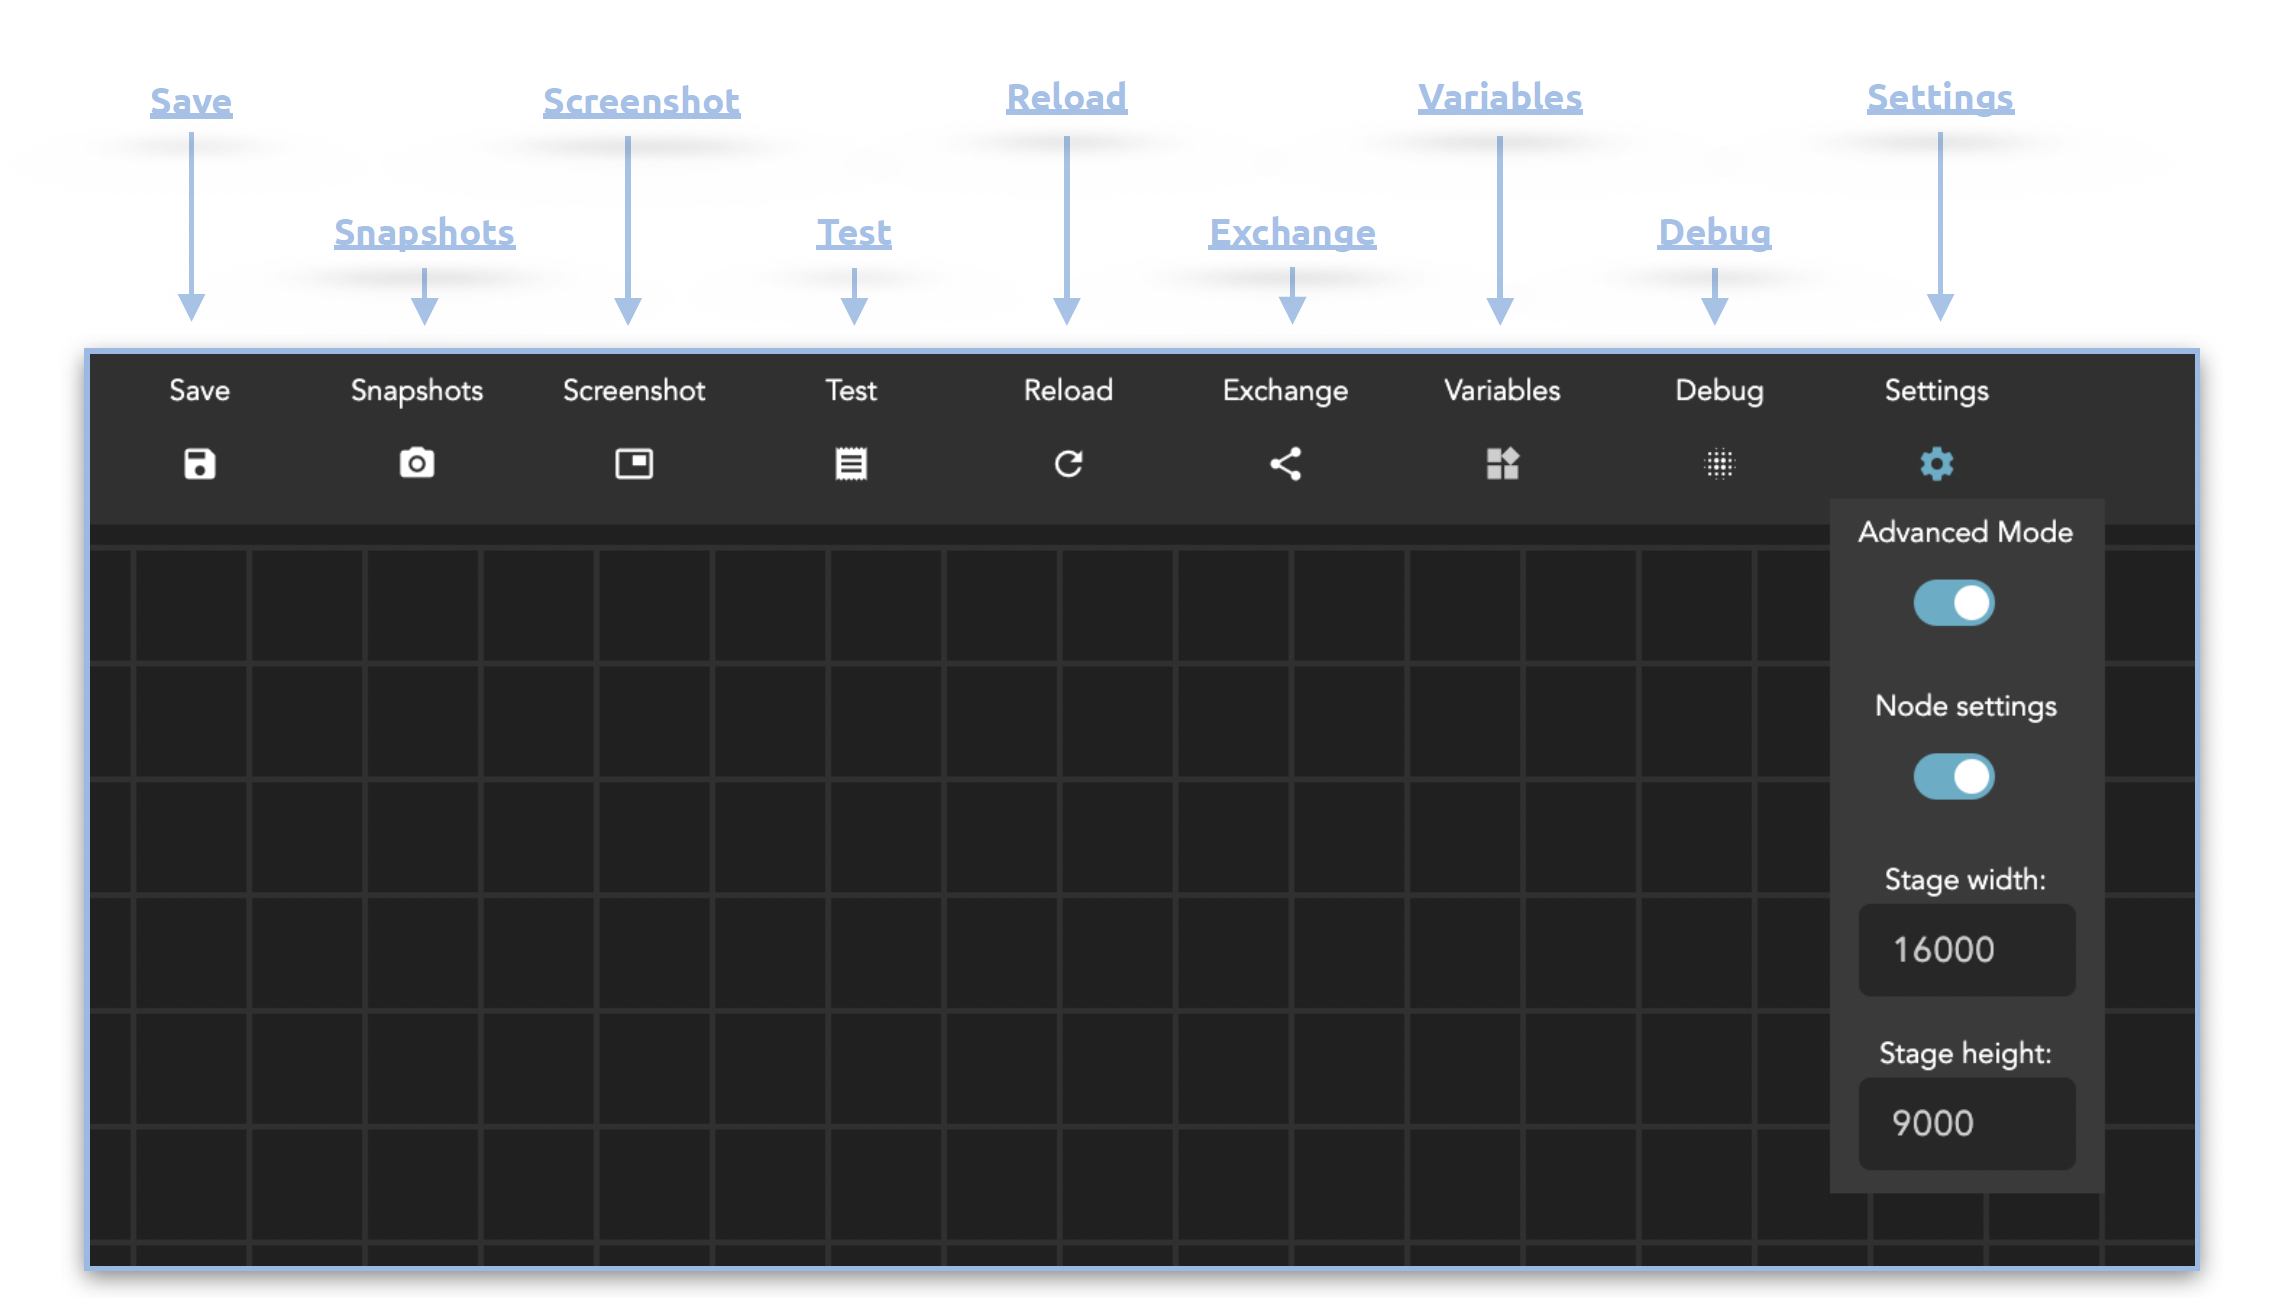
In the middle you can find various actions. These actions will be explained below.
Save
Saves the current stream.
A stream can also be saved by using the shortcut Ctrl+S or Cmd+S
Snapshots
Opens a dialog for managing snapshots.
As the name suggests, snapshots are saved versions of a stream. A snapshot can be created for a single stream and called up at any time.
A created snapshot refers only to the stream in the currently opened Stream Designer. When a snapshot is called, it is loaded into the stream, overwriting the current settings (please remember to save, otherwise, the settings will be discarded).
This function is not to be understood in terms of versioning, as a stream can only exist once in the system. It is a way of saving the state of a stream and recalling it later. Enabling the 'Show all' button makes all global snapshots from other streams visible. The following functions are available:

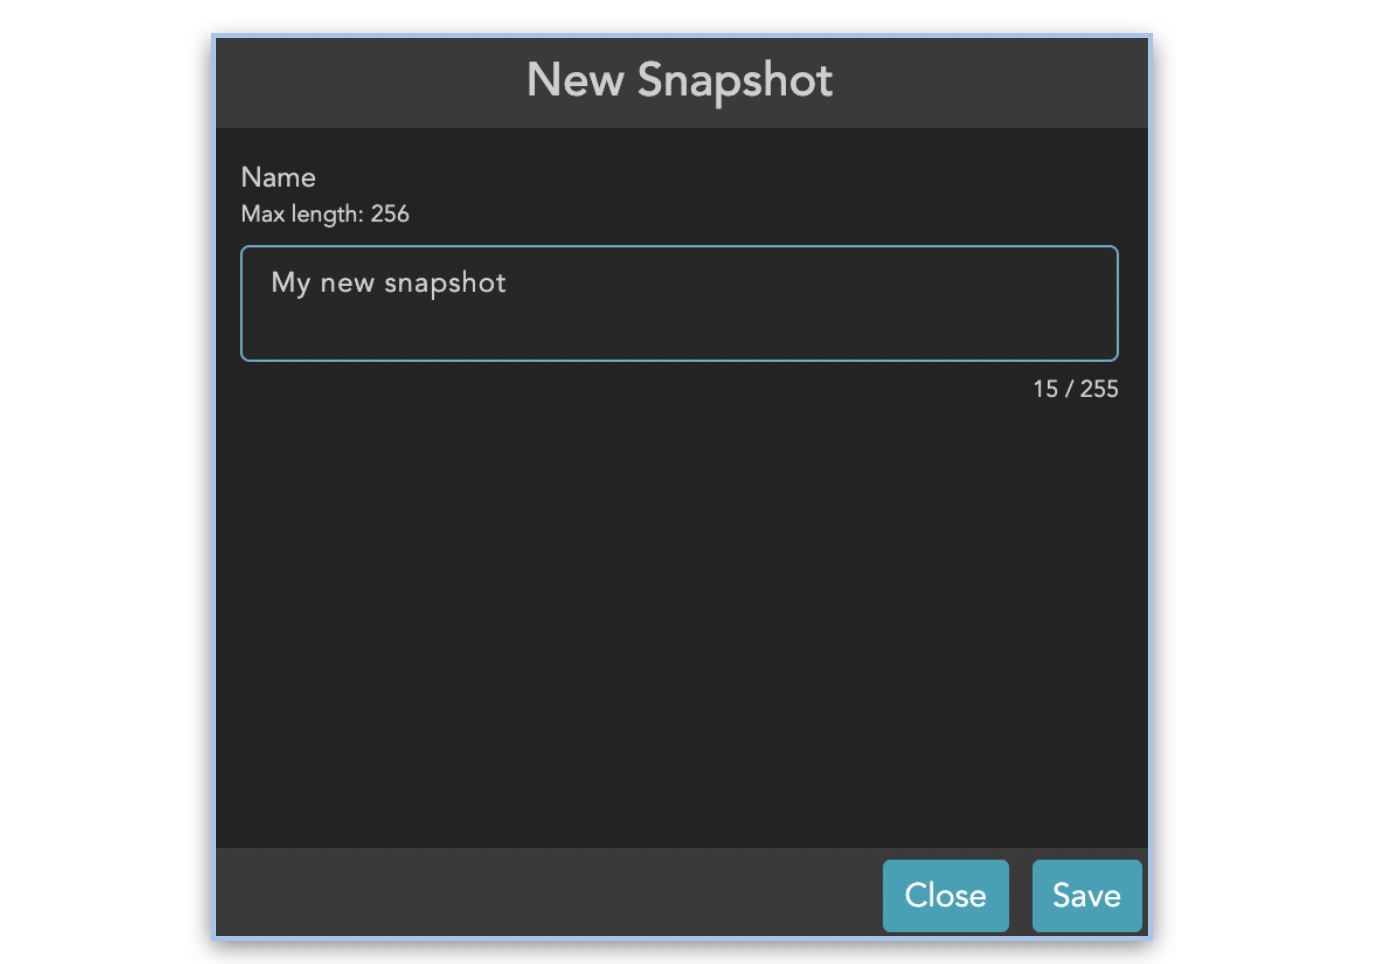
New Snapshot
Opens a dialog with which it is possible to add new snapshots. Opens a dialog with which it is possible to add new snapshots. The character length of the name is limited to 255 characters.
Screenshot
Creates a screenshot of the stage that is holding all your nodes (available in Chrome only). The Size of the screenshot is related to the stage width and height which can be defined under “Settings”.
Test
This initiates the stream in a test suite, executed as a server stream. Please bear in mind that in this test mode, it is not possible to run any job-related nodes. It can be used for partial tests, such as wildcard resolving, and so on.
Test can also be triggered when pressing the T button.
Performing a test will result in a "server stream," as the stream container is responsible for executing this stream.
Complex or job-related streams cannot be processed; logs for these streams will be accessible in the stream container via Portainer.
Reload
Resets the stream to the last saved point.
Exchange
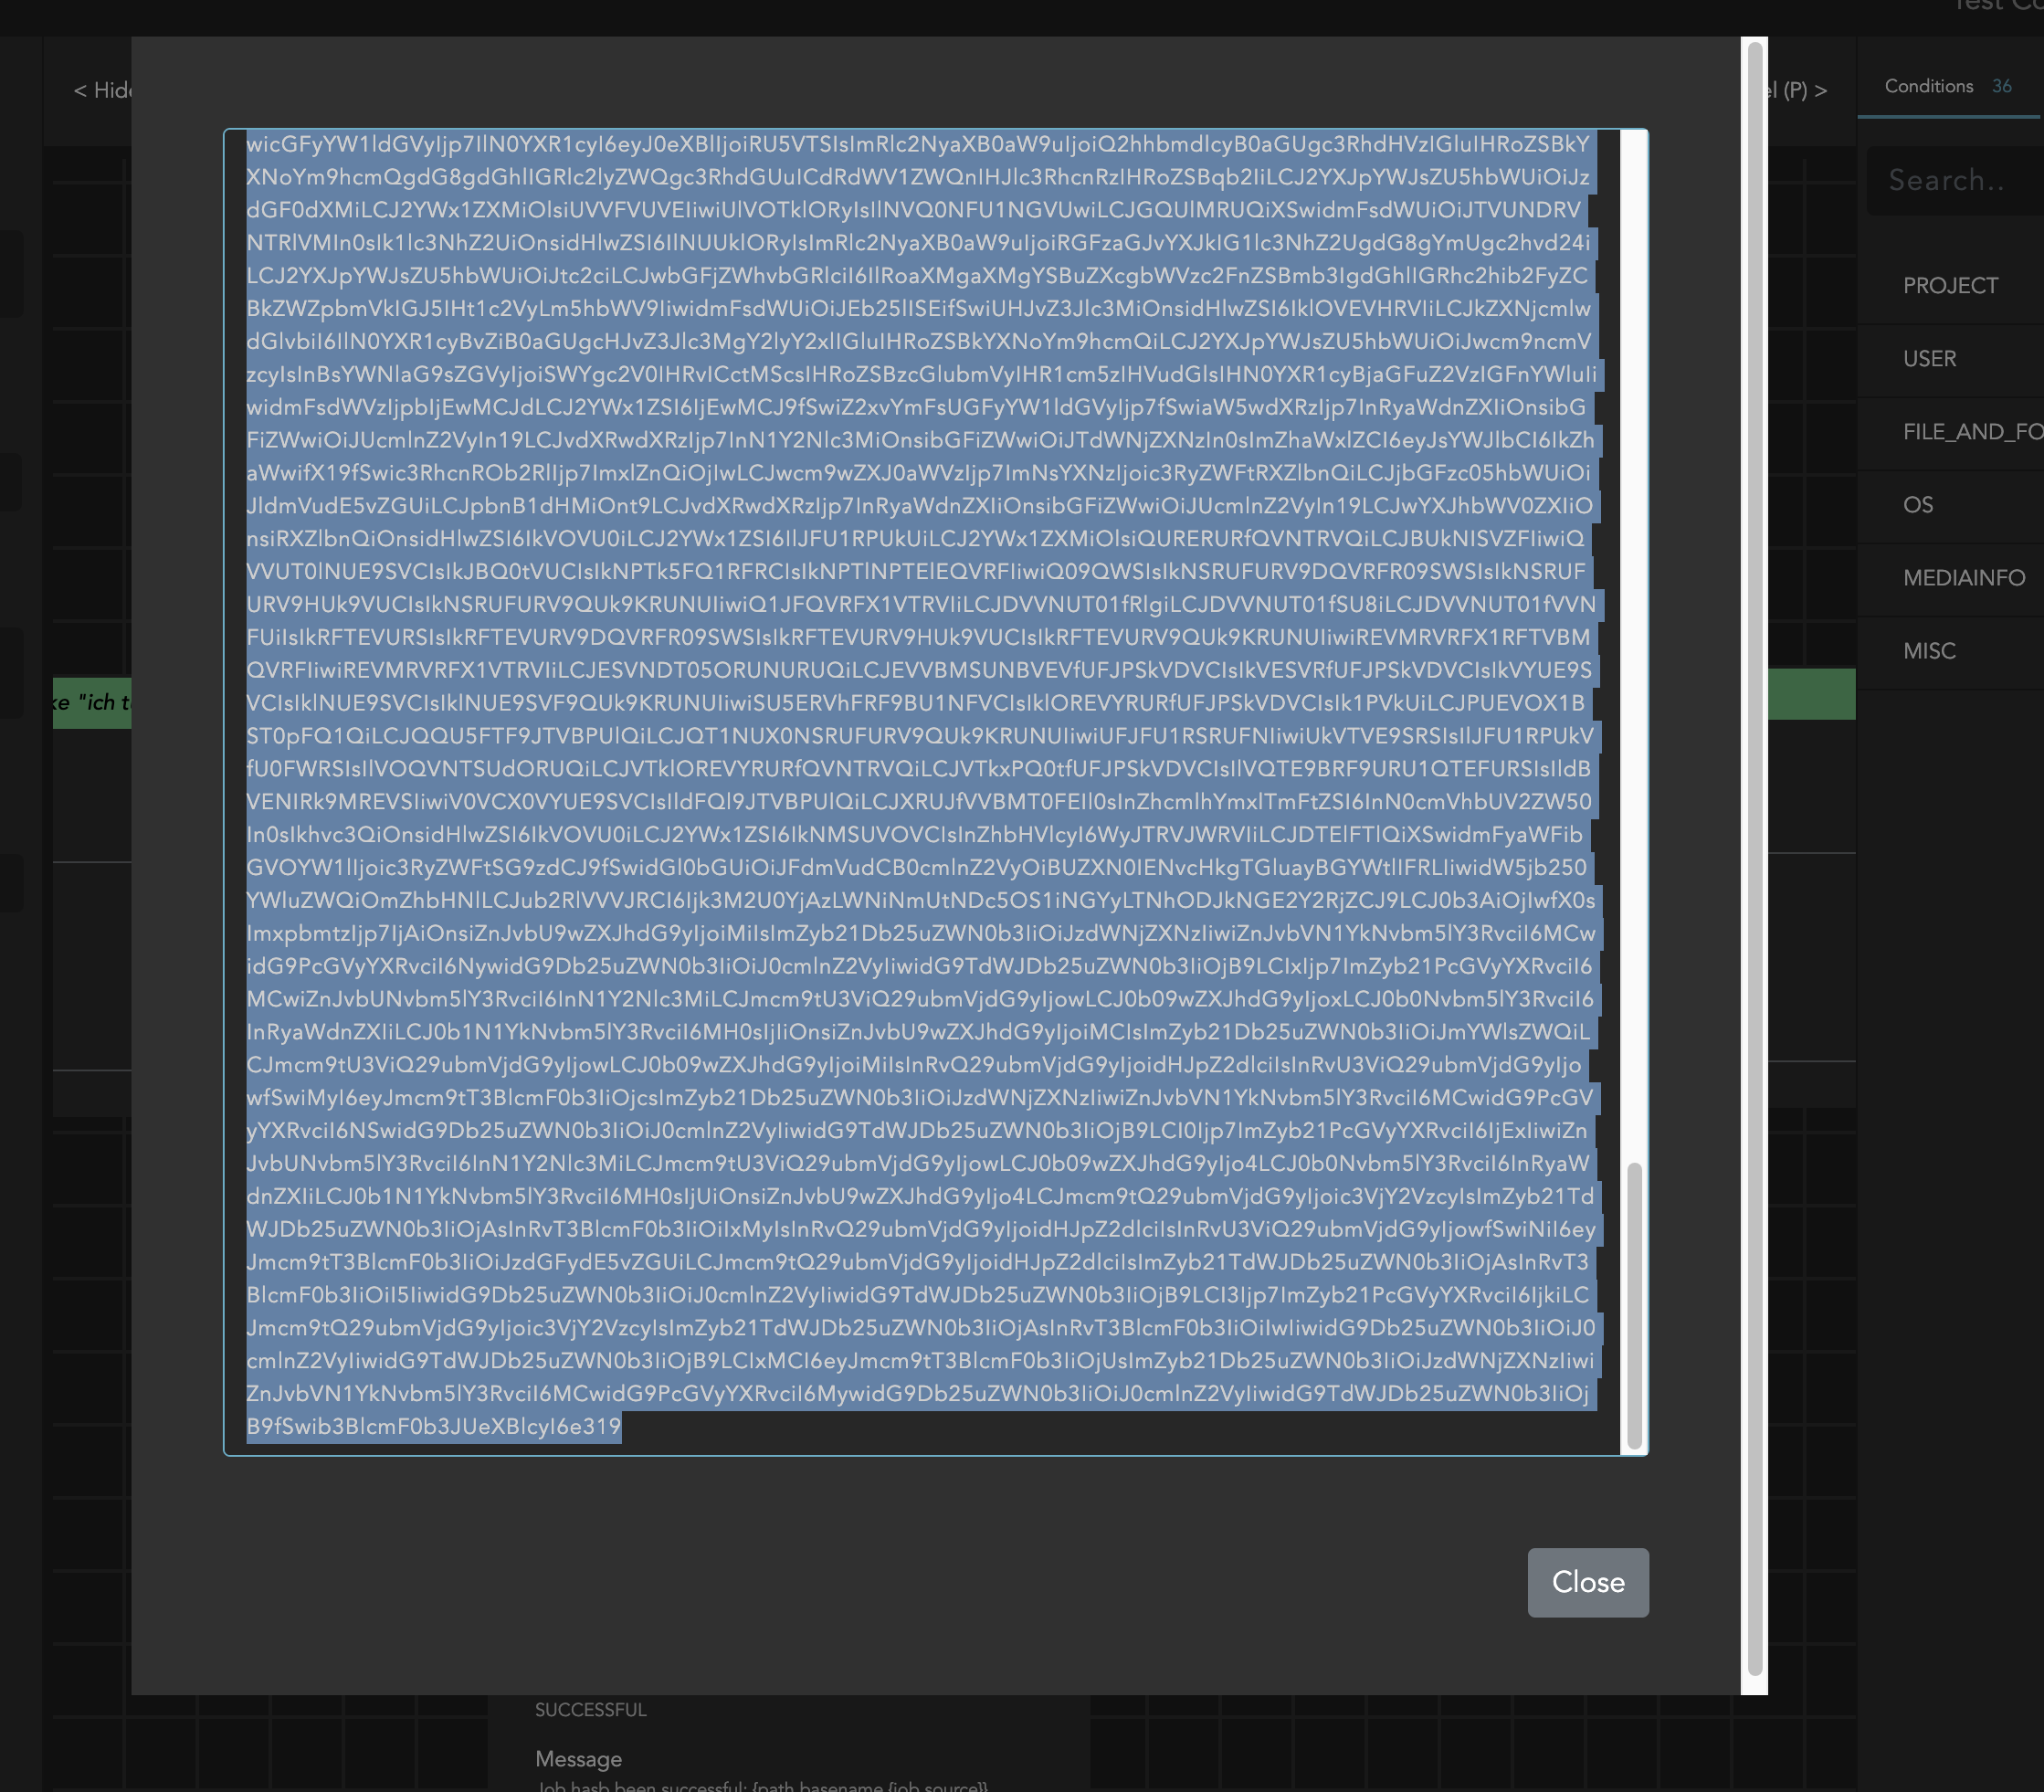
This opens a dialog box with the current stream as a string, base-64 encoded. Use it to exchange information with others, for example, in a support request. You can also paste a string into a new, empty stream to load it.
Exchange can also be triggered when pressing the E button
Example
Variables
Opens a dialog for managing store variables. In contrast to the variables that are managed via the Preferences menu, the store variables managed here can also be controlled via streams, i.e. they can be created, changed or deleted via a stream.
For further informations please have a look at this article: Stream Variable Store
Debug (in a stream)
Once a stream is uponed in the stream designer the debugger can be opened/activated via the "Debug" icon in the upper bar.
This open a debug overlay that shows the realtime output of streams (during execution), limited to the currently open one. The size of the debug overlay can be extended to full screen by clicking on the arrow on the right side.
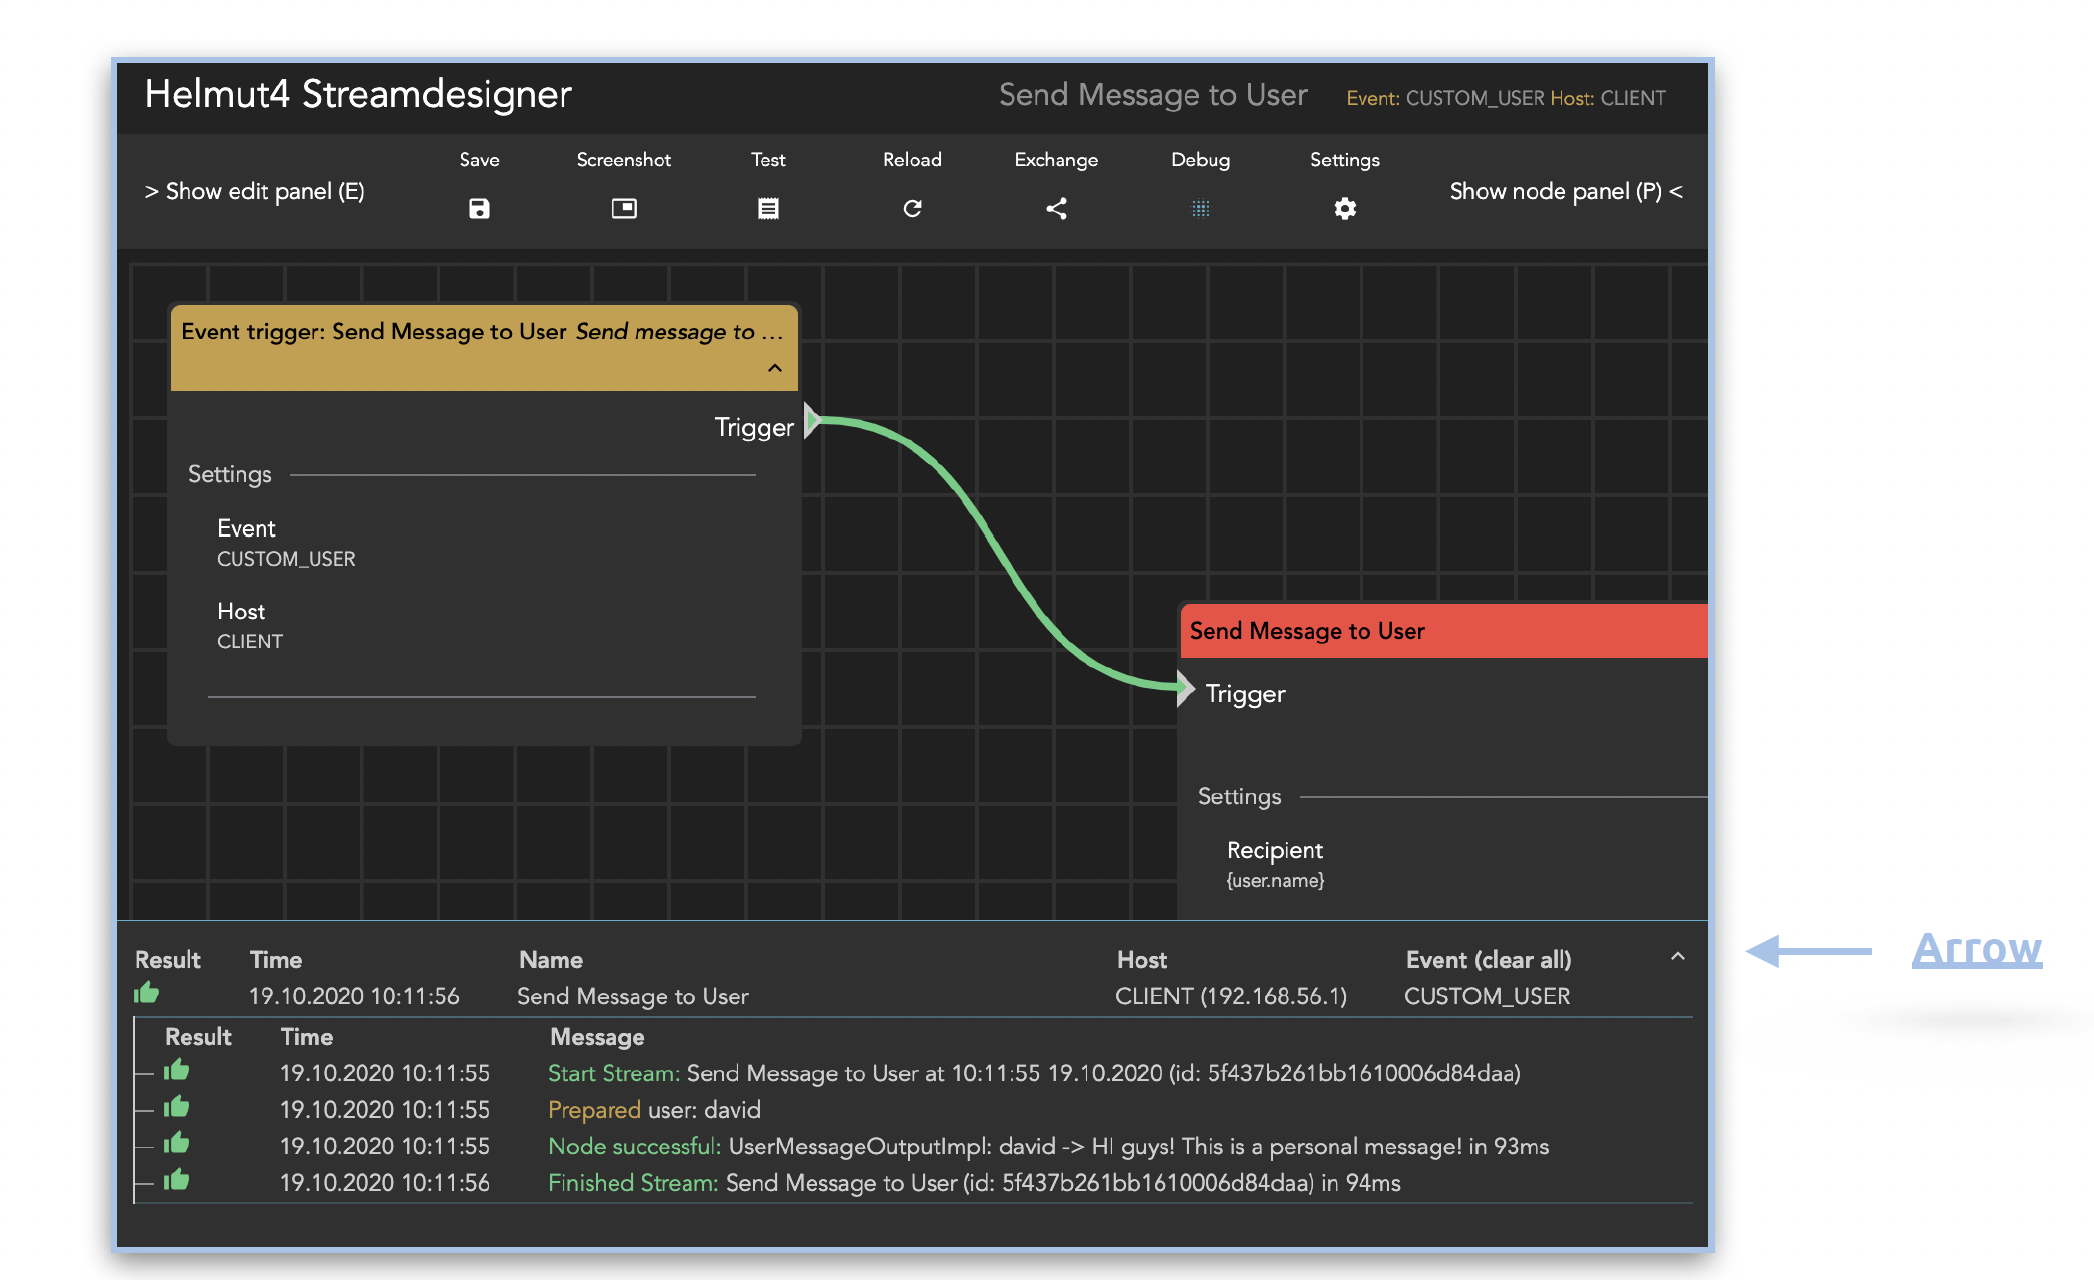
Additionally it is possible to access a global view of the Stream Debugger to monitor and control all processes according to stream. For that the "Debug Streams" button which can be found in the Streams tab of FX, IO, CO and HK should be clicked. This leads to the action that the stream debugger will be opened.


Check Debug Streams for more information.
For a real-time debugging information see Stream Debugger.
Settings
Advanced Mode: When disabled, it will filter out the available nodes and wildcards to match the stream event. When enabled, it shows all available nodes and wildcards.
Node Settings: Will hide all node details in the stage to reduce the height to a minimum and hides the option to minimise single nodes.
Width & Height: Adjust the stage’s width and height. Very handy if you want to take a screenshot or do not have enough space.
Edit Panel
On the left side you find the Edit Panel (if toggled on).
You can use P to show/hide the dialog. Once you have selected a node by clicking on it, you can edit its content.
Node information
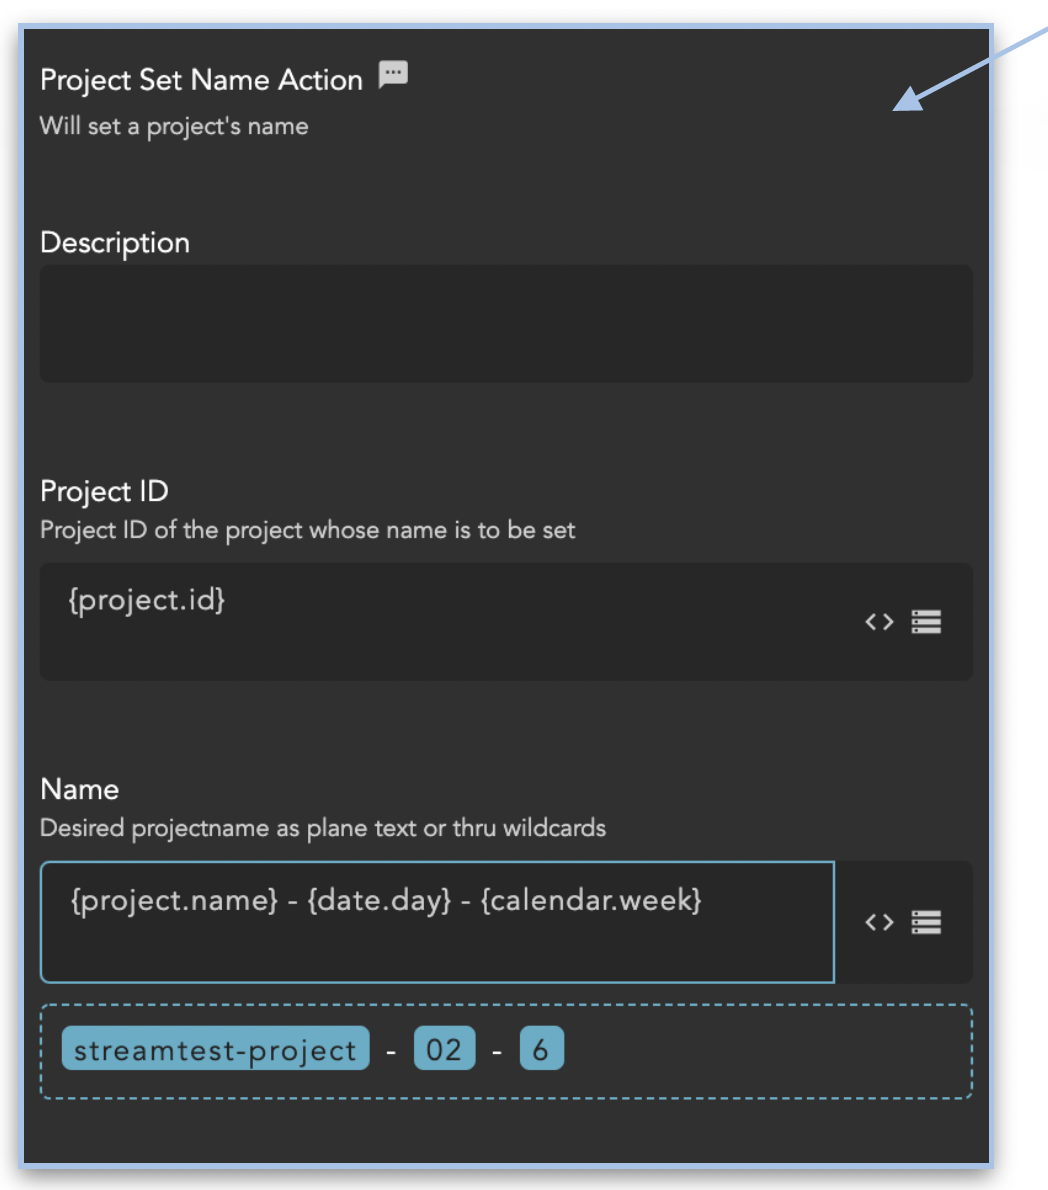
On the top, you find the name of the node together with a small description. This description can be changed by using the Description Field.
Description Field
The description field can be used to add your own comments. The first 25 characters will be shown in the the node’s header on the stage.
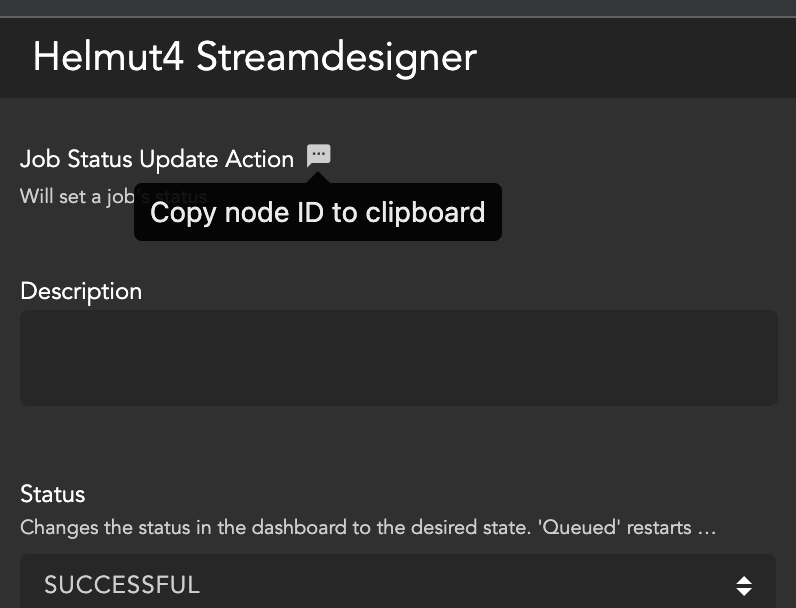
UUID Copy Icon
Every stream has a UUID (Unique ID). The UUID of a Stream can be copied to the clipboard by clicking on this icon. The UUID can be used in any node that follows after the node the ID was copied from. It is possible to use the wildcard {node.result.?} and replace the ? with the UUID. This wildcard will be replaced with the output of the node with the given ID. As soon as the {node.result.?} wildcard is used and the UUID from a specific node is added, it is possible to click on the highlighted wildcard to get redirected to the Node where the UUID is coming from. It is not possible to delete a node whose UUID is used in another node.
Wildcard Pallet
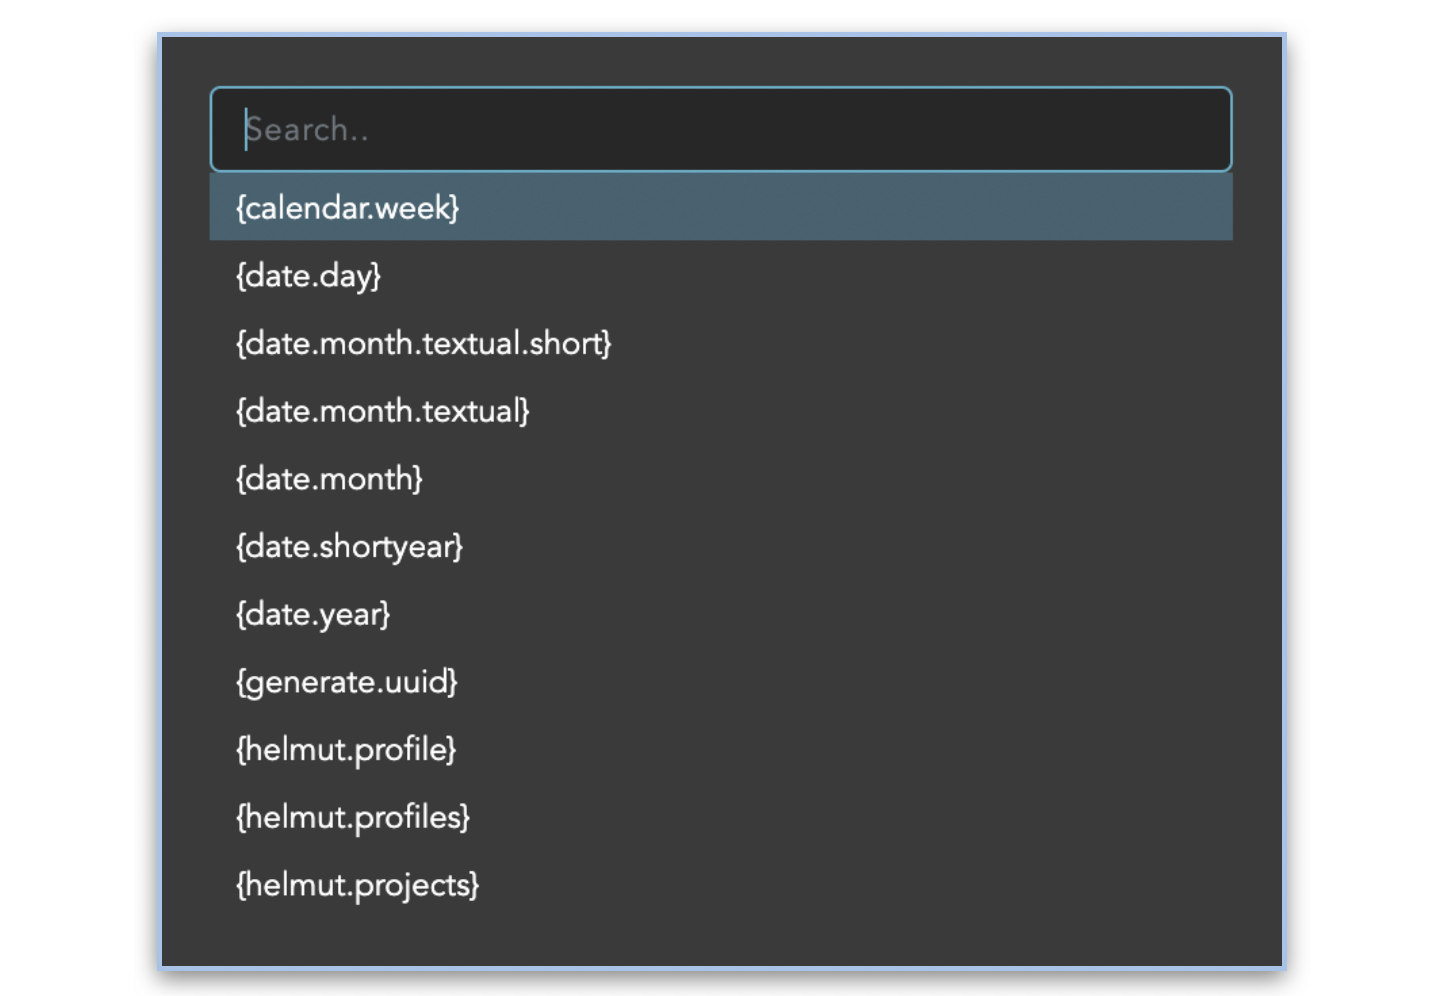
The icon next to the input field opens the placeholder palette. It has a type ahead function and the selected placeholder is placed at the cursor position in the edit field. If the selected wildcard contains a “?" (place holder for, for example, a path or another wildcard), this is automatically highlighted to speed up further processing.
File Chooser
This icon opens the Stream Designer File Chooser. It is possible to browse the volumes mounted under the Helmut4 host system and select individual files. This is particularly helpful when it comes to config files such as .epr's for the media encoder. By clicking on the name of a folder it is possible to browse through the folder structure. Each selected folder is added to the breadrumb. By clicking on a folder name in the breadcrumb navigation it is possible to jump back. A click on the Select button selects the path of the corresponding file and transfers it to the edit field of the node.
Node Panel
The node palette lists all available actions, conditions, outputs and wildcards and enables you to find the desired node / wildcard using a search field.
An entered search leads to the number of available conditions / actions / outputs and wildcards being displayed directly.
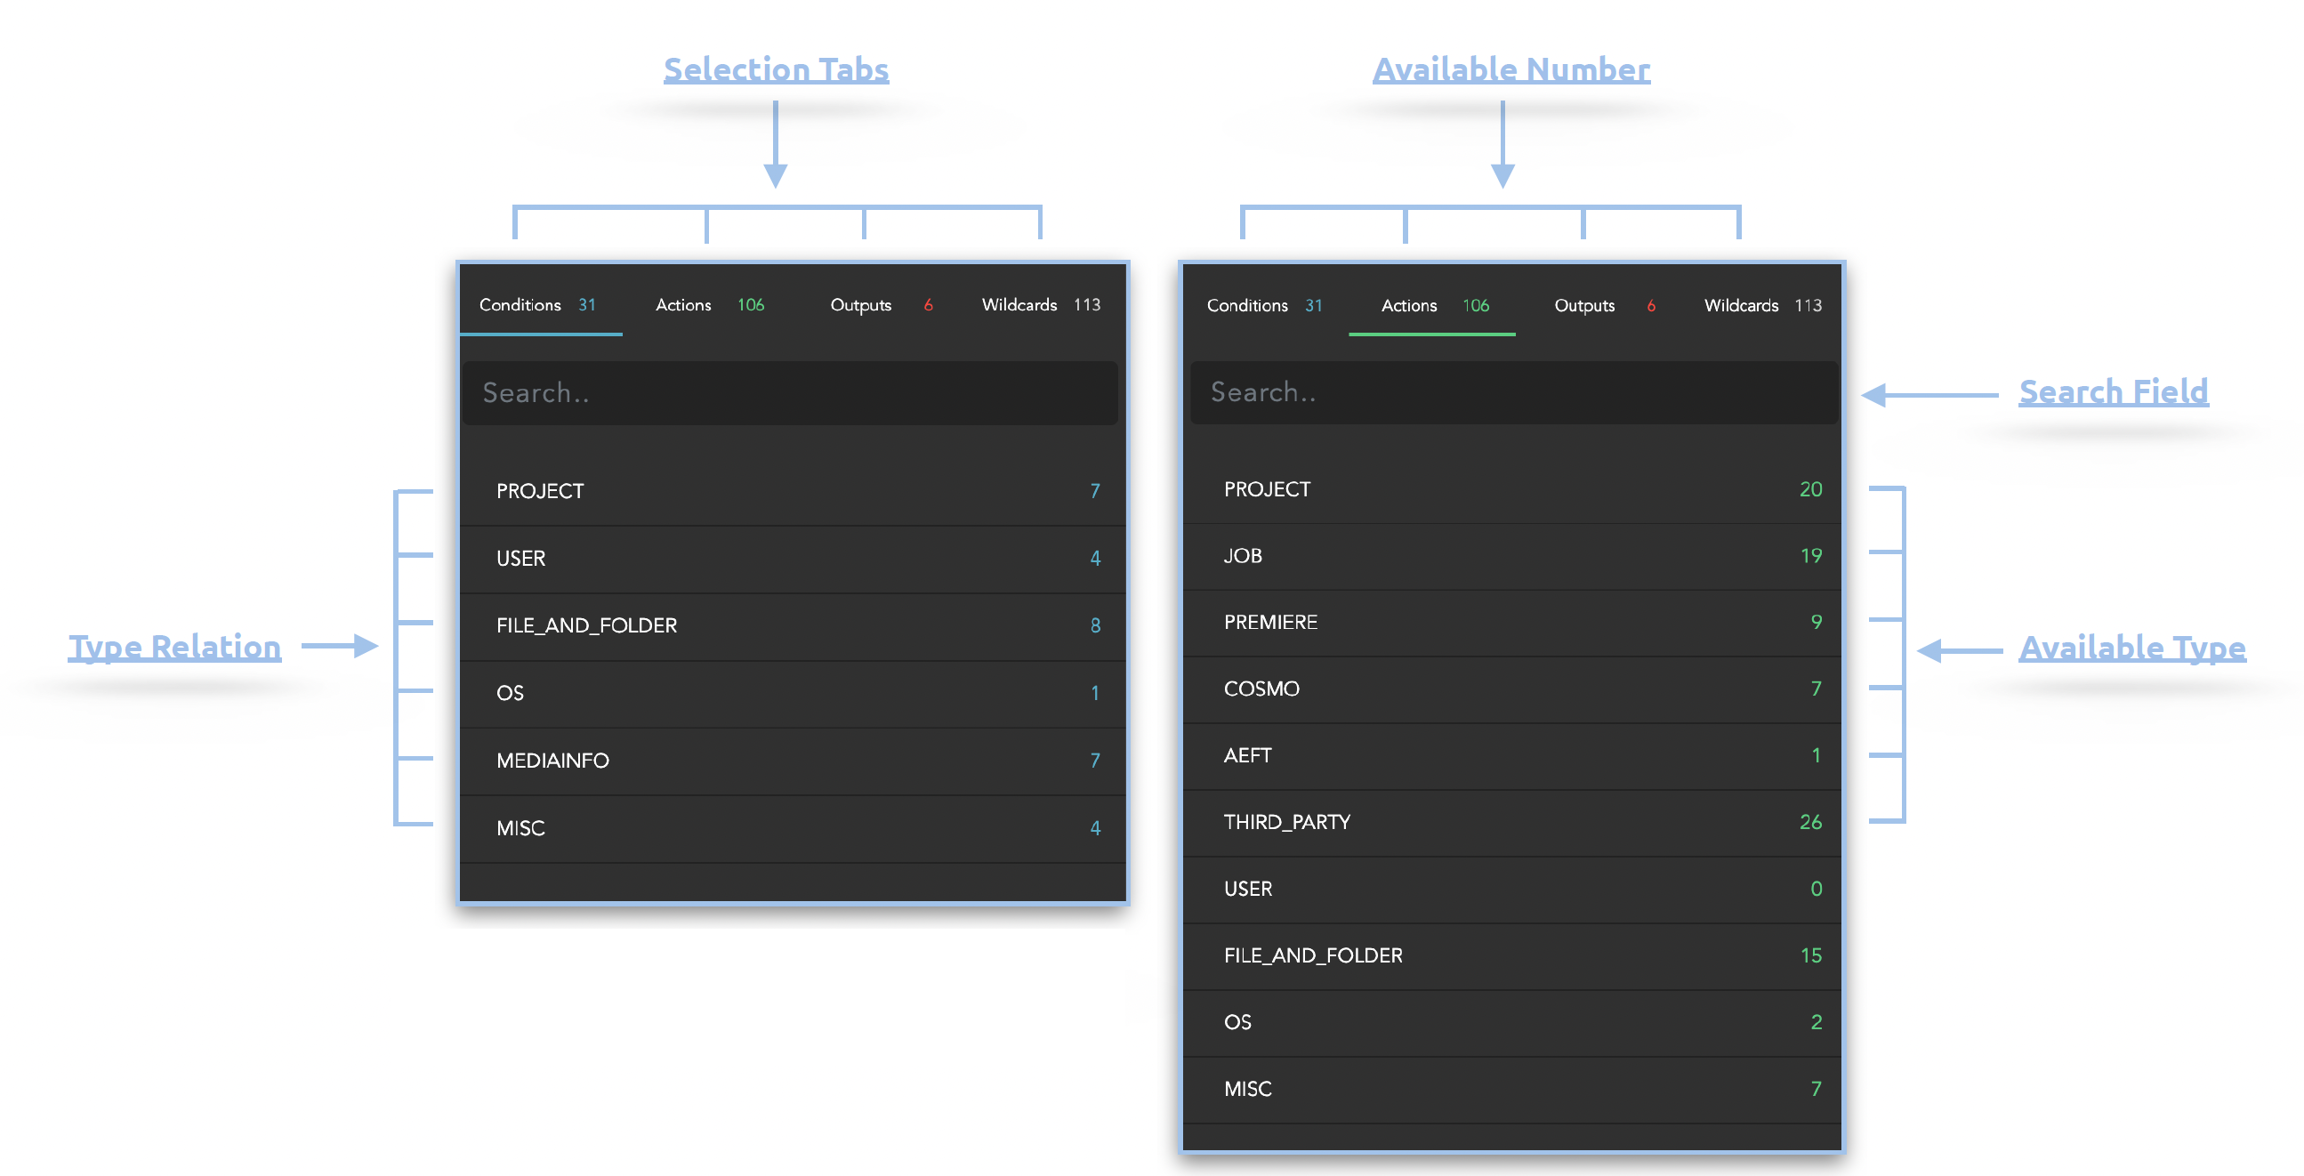
Selection Tab
It is possible to switch between the individual tabs, whereby the affiliations are sorted by type. For example, there are 31 conditions in the system which are divided into 6 types. Project-related conditions, user-related conditions, file and folder-related conditions, etc.
Available Number
The number of available nodes / wildcards is displayed next to the name of each tab. This changes as soon as a search is applied. This makes it possible to immediately see how many nodes / wildcards are available according to the search.
Type Relation
If a tab is selected (for example Consitions) the corresponding types are displayed under the search field. This view changes per tab, since not all wildcards have the same types of affiliations.By clicking on of the types. If one of the types is clicked, another view opens, in which the actions / wildcards assigned to the type are displayed.
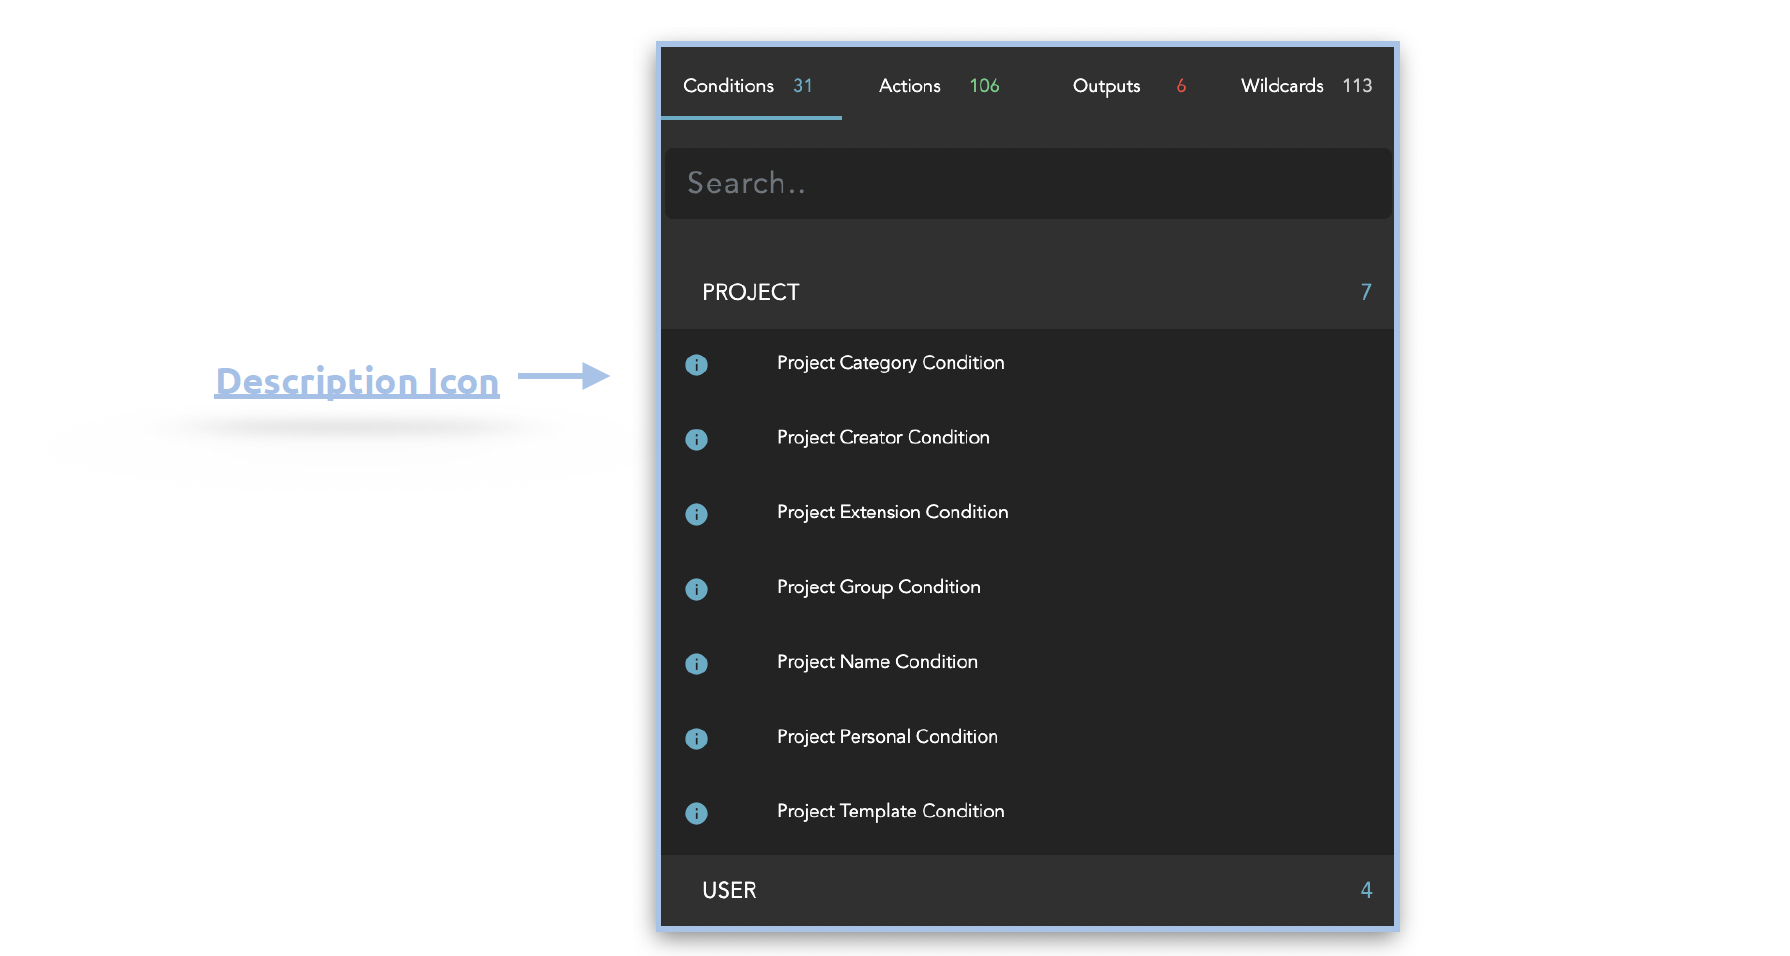
Description Icon
If you move the mouse over this icon, a description field opens in which the individual parameters of the respective node are displayed, as well as the function of the node and what it can be used for.
Search Field
Free text field to search for a wildcard / node. As soon as something is entered in this field, all tabs are filtered and the number of results per tab is automatically adjusted. The affiliation by type is then no longer visible.
Available Type
The number next to the respective type shows how many nodes / wildcards are available for this type.
Shortcuts
The following shortcuts are available in the Stream designer:
Keyboard / mouse actions
P Show/Hide the Node Panel: On the right side, a panel can be displayed, showing all existing nodes and wildcards. From this panel, you can drag and drop individual nodes as well as wildcards into the Stream Designer window.
E Show/Hide the Edit Panel: On the left side, a panel can be displayed in which you can modify a selected node according to your needs.
Ctrl/Cmd + S Saves the current stream. Each stream must be saved individually.
Ctrl/Cmd + C Copy one or multiple nodes.
Ctrl/Cmd + V Create a new node from the clipboard if a node was previously copied. If several nodes were selected, they will be inserted while maintaining their relative positions to each other. If HTTPS is activated, it is possible to copy nodes between individual streams (only available in Chromium based browsers).
Ctrl/Cmd + L Automatically sorts all connected nodes on the stage. When selecting one or more nodes using Shift + right mouse button, this function applies only to the selected nodes. Note that this action cannot be reversed.
Ctrl/Cmd + K This open up the Stream Variable Store.
Ctrl/Cmd + E This creates an exchanger string that can be shared among other Helmut4 systems. It serves as a faster alternative to Export Streams and Import Streams.
T This initiates the stream in a test suite, executed as a server stream. Please bear in mind that in this test mode, it is not possible to run any job-related nodes. It can be used for partial tests, such as wildcard resolving, and so on.
Delete/Backspace Deletes one or multiple selected nodes if they have been selected previously.
Shift + Left Mouse Click Selection Select all nodes touched by the custom selection field.
Mouse wheel With the mouse wheel it is possible to zoom in and out of the stage.
Each node has an input trigger and a positive/true and negativ/false output. Outputs can be connected to input triggers via mouse. An existing connection can be resolved by clicking and deleting it (Delete key).
Right mouse key context menu:
The three different function modes of the search field can be changed using the Tab key.
If the text field is empty, you are in Mode 1: Find and open action nodes.
If the text field begins with an arrow, you are in Mode 2: Execute menu functions (middle menu).
If the text field begins with a colon, you are in Mode 3: Switch between streams.

Context menu mode 1
A node can be searched directly via the search field, provided that the corresponding name is known. The search field also has a type ahead function. It is possible to scroll through the displayed action nodes using the arrow keys.
Context menu mode 2
A menu function can be searched for directly via the search field. The search field also has a type ahead function. With the arrow keys it is possible to scroll through the displayed menu items and to execute the desired one with a mouse click or with the enter key.
Context menu mode 3
A stream can be searched directly via the search field, provided the corresponding name is known. The search field also has a type ahead function. Using the arrow keys, it is possible to scroll through the available streams and execute the desired one with a mouse click or with the enter key. This will open a popup dialog asking if you want to see the current stream.